Windows 10 Pro and Home can be reinstalled using a USB flash drive and a tool from Microsoft. This guide will walk you through creating the flash drive and performing the installation.
Prerequisites
- An 8GB or larger flash drive (USB 3.0 model recommended for speed)
- A PC running Windows 10
- The Media Creation Tool, downloadable from here.
Creating the flash drive

- Download and run the Media Creation Tool, linked above
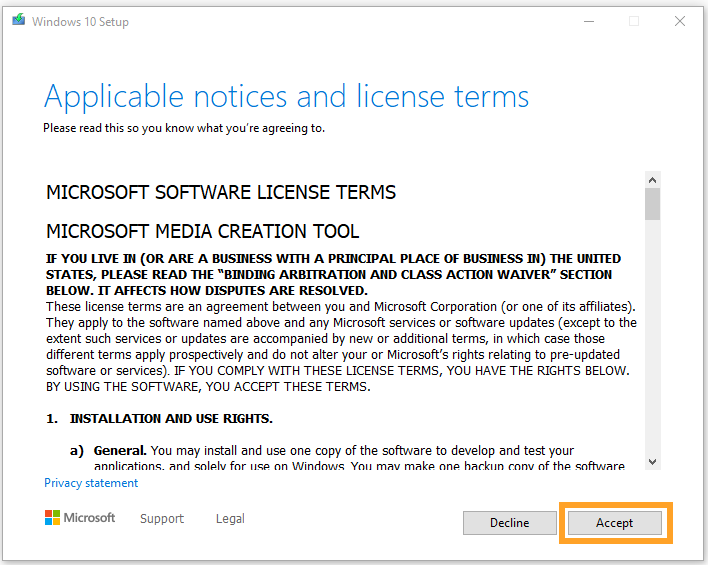
- Accept the license agreement
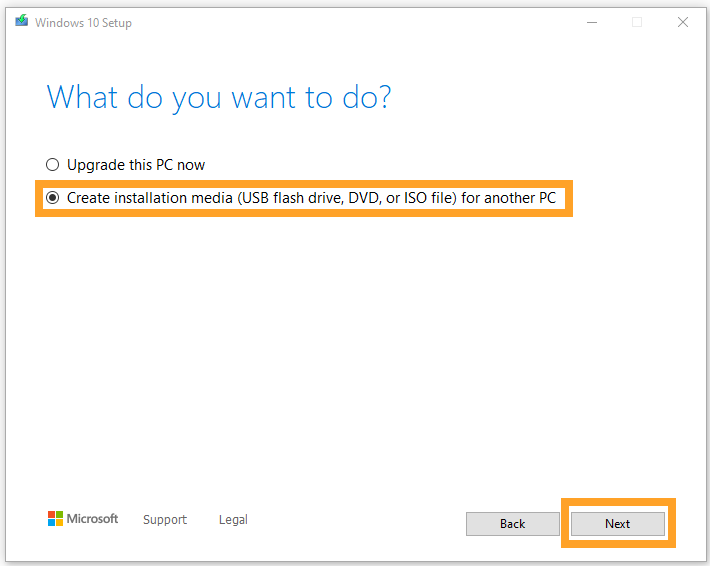
- Choose the 2nd option and click Next
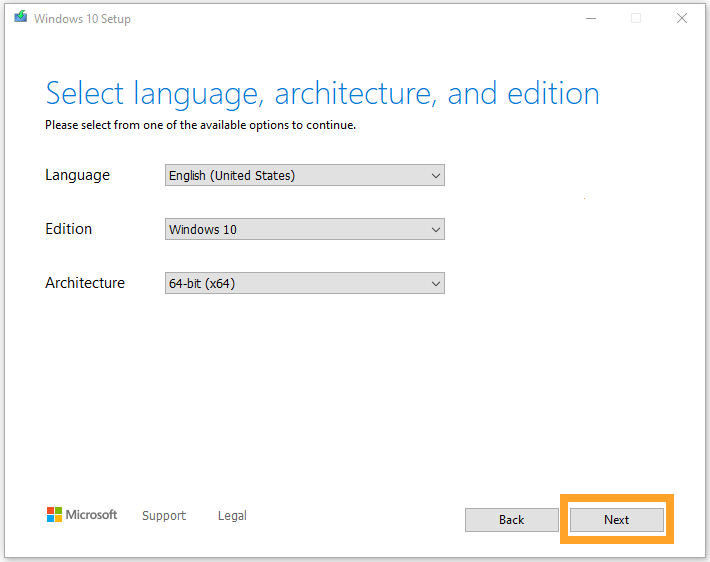
- Specify the architecture. In almost all cases, the default of 64bit is correct.
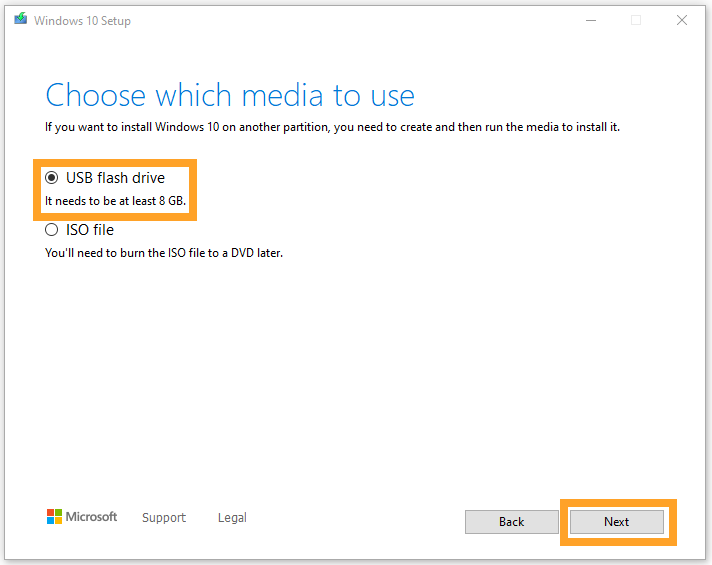
- Select USB flash drive and click Next

- Choose your flash drive from the list and click Next
- If the drive does not show, ensure it is formatted as FAT32 or try a different drive.
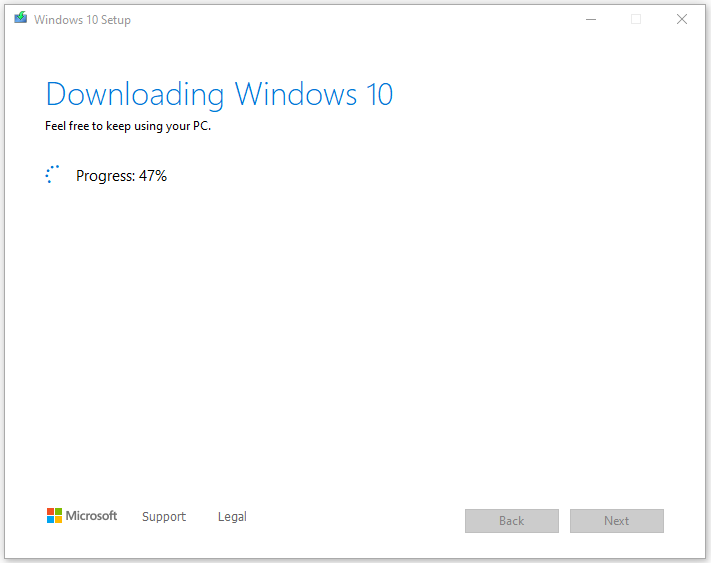
- The Windows 10 installer will now download from the Internet and make the flash drive bootable. This will take several minutes depending on the speed of your flash drive and Internet connection.
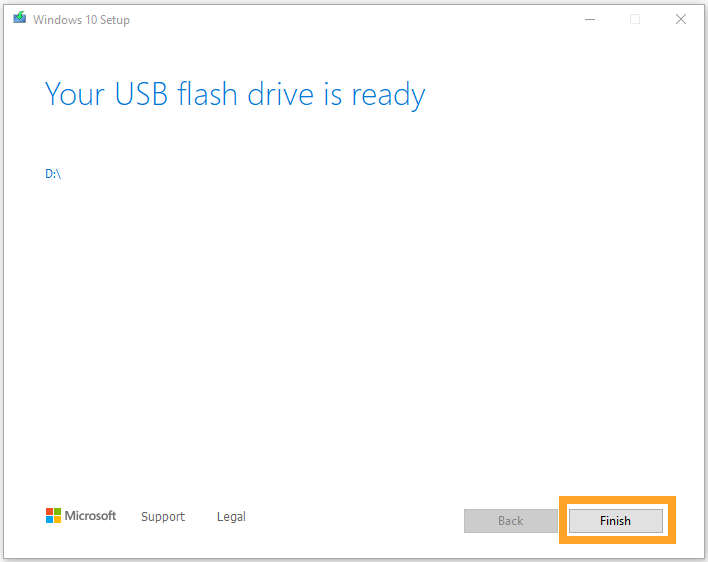
- When the tool finishes, click Finish to close it.
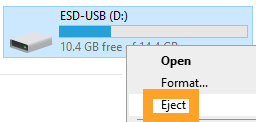
- Safely eject the flash drive and unplug it from the PC.
Installing Windows
- Connect your newly created flash drive to the OnLogic PC and boot to it.
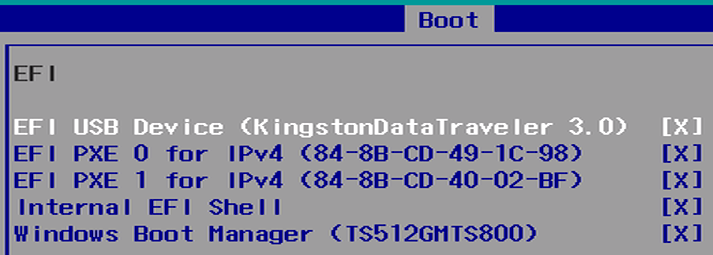
- Press F2 or Delete to access the BIOS. Under the Boot tab, make it the first boot device.
- Exact boot instructions vary by model. If you need assistance, contact support@onlogic.com.
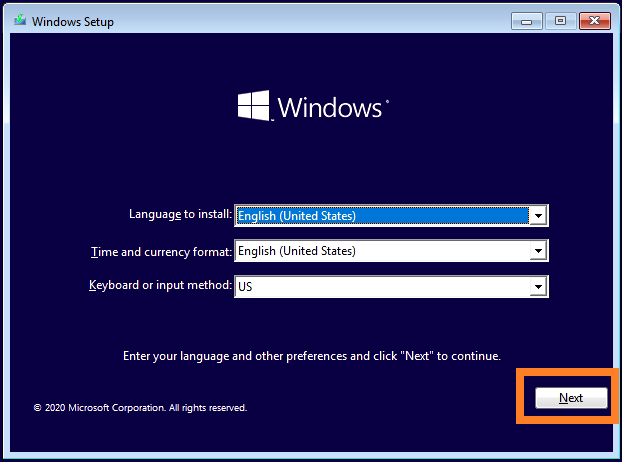
- When the flash drive boots, you will be presented with this screen. Select Next.
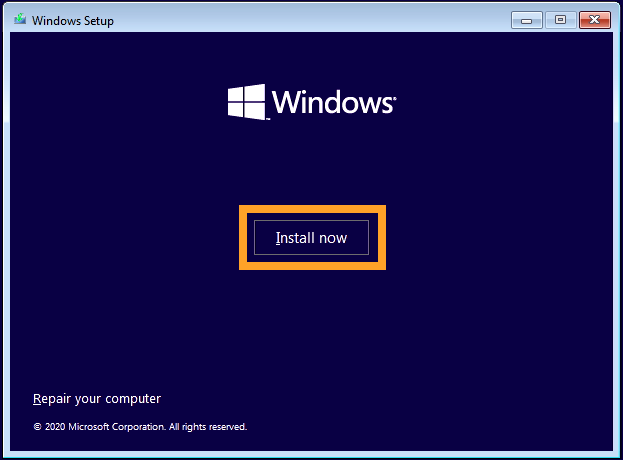
- Click Install now
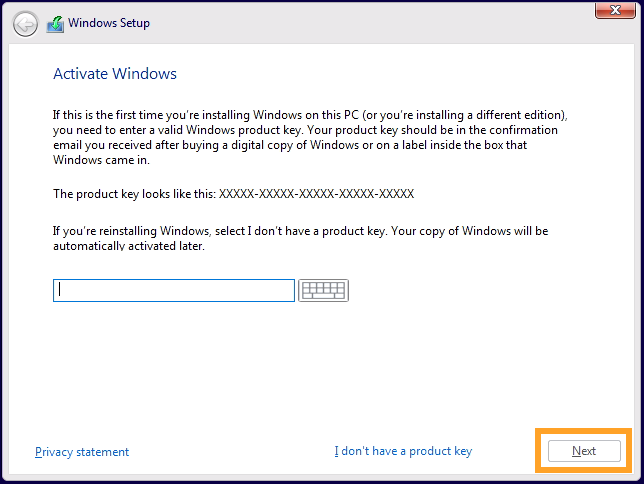
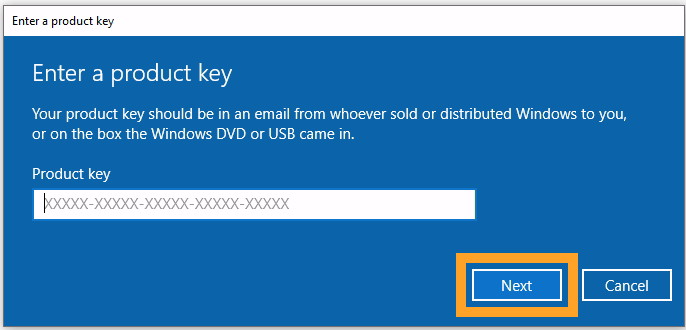
- Enter the product key from the bottom of your OnLogic PC and click Next.

- If prompted (typically when you don’t enter a product key), select your version of Windows.
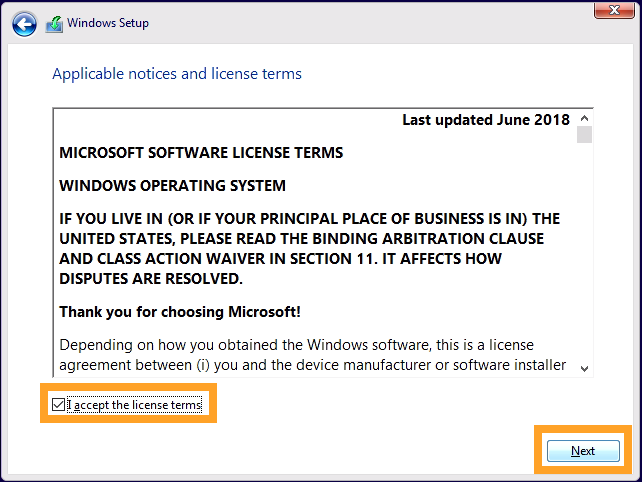
- Accept the license agreement and click Next
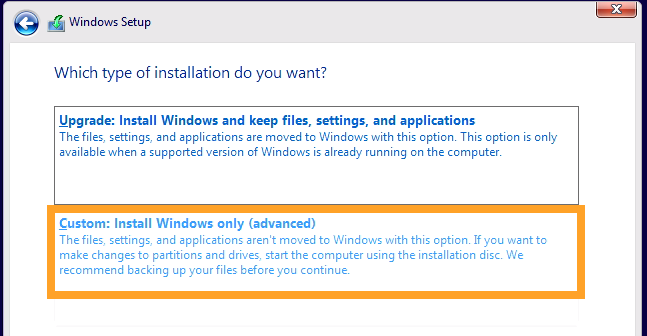
- Choose the option for Custom installation
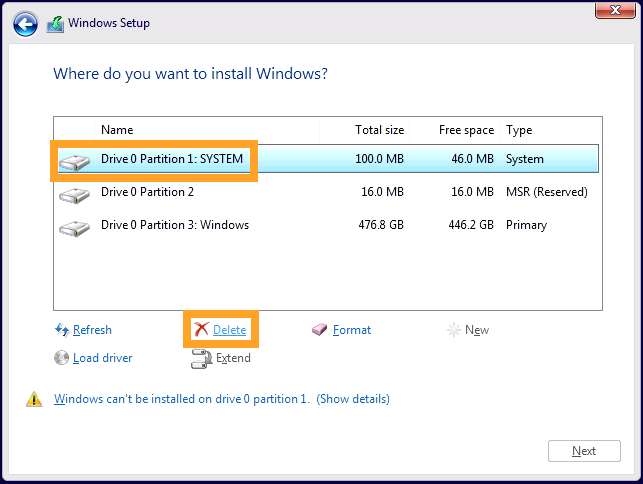
- Delete all partitions from the drive you will be installing Windows 10, typically Drive 0.
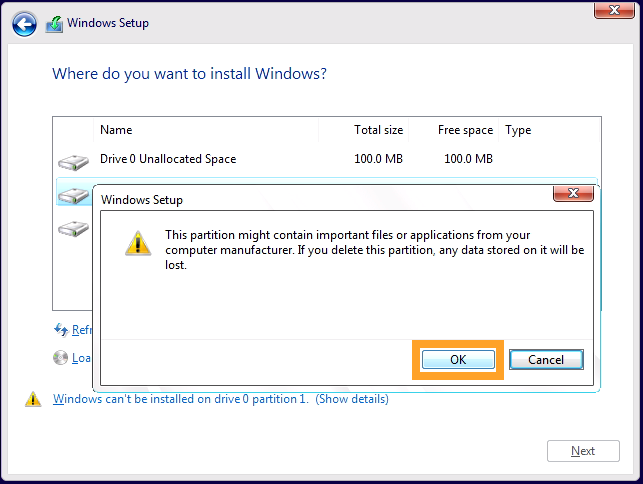
- Double check that you are deleting the correct partitions and click OK.
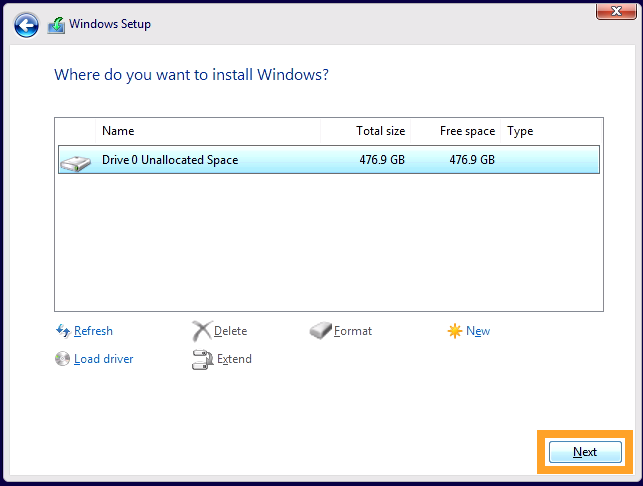
- With all partitions deleted, the Window should look like this. Click Next. New partitions will be created automatically.
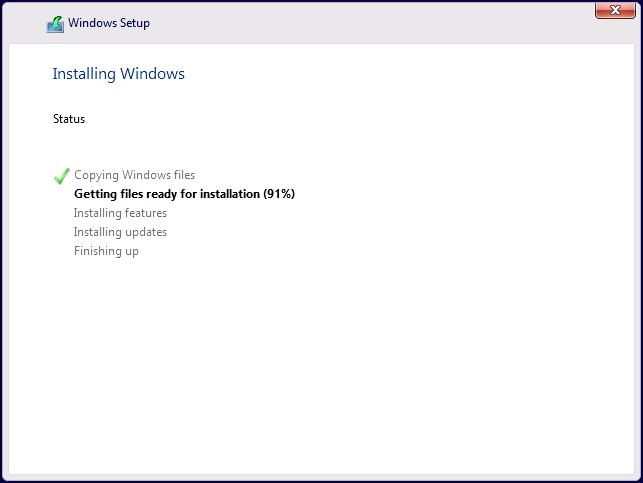
- Take a break while the installation proceeds
First Boot & Setup
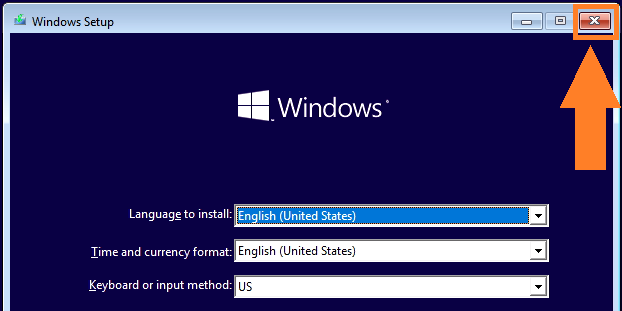
- Depending on the boot settings, the system may boot to the flash drive again. If that happens, click the X to reboot and immediately remove the flash drive.
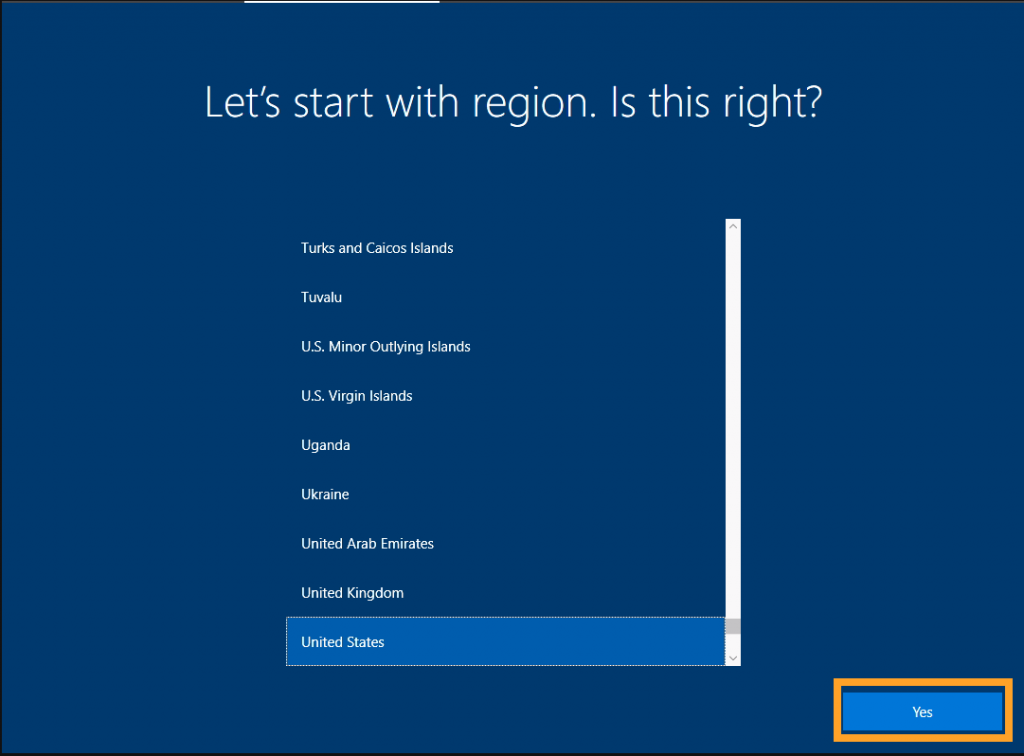
- When booting to your new Windows installation for the first time, you will be presented with this screen
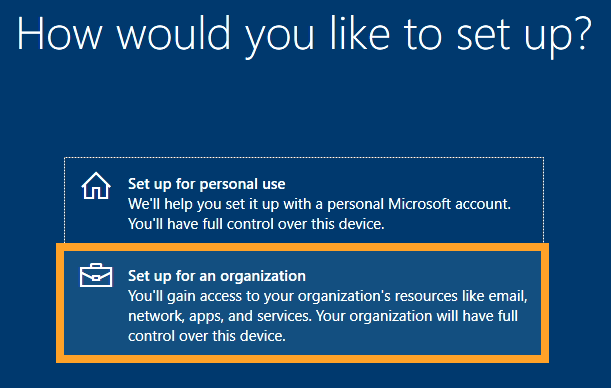
- Choose :set up for an organization

- You may log in with your Microsoft account if desired.
- In many business use cases, that is not desired. You can create a normal account with the “Domain join instead” button.

- Enter a username and click next. Set a password if desired.
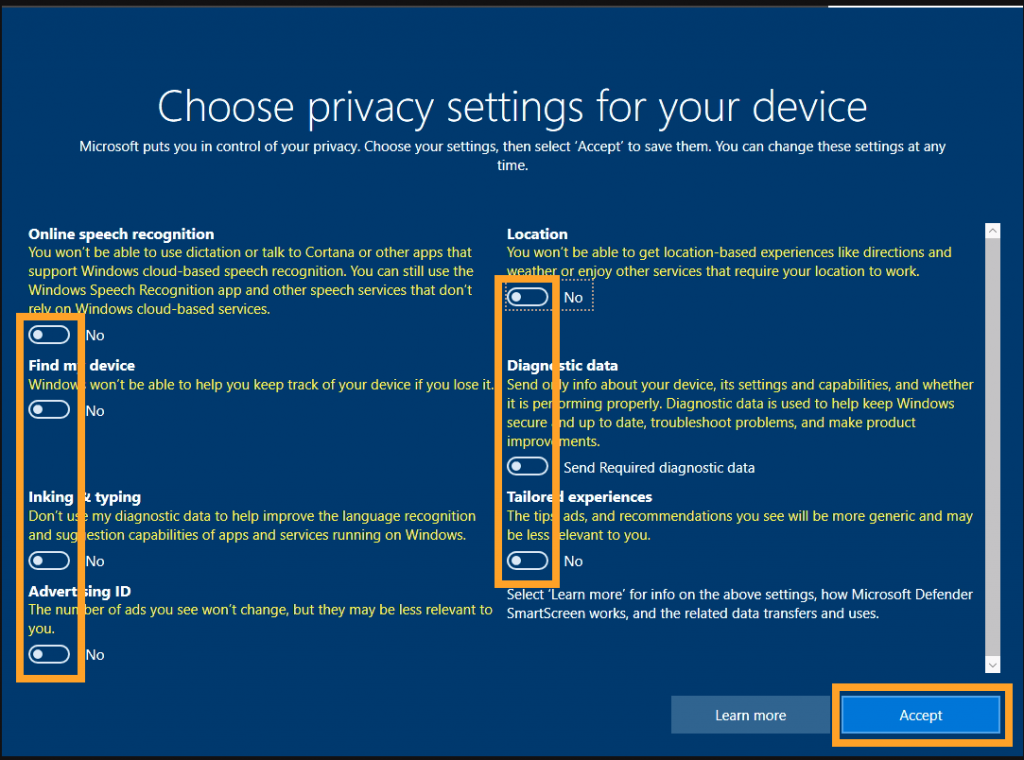
- The options on the next screen primarily affect apps from the Microsoft Store. Disabling all options will minimize intrusions if those apps are not used. This can be changed later.
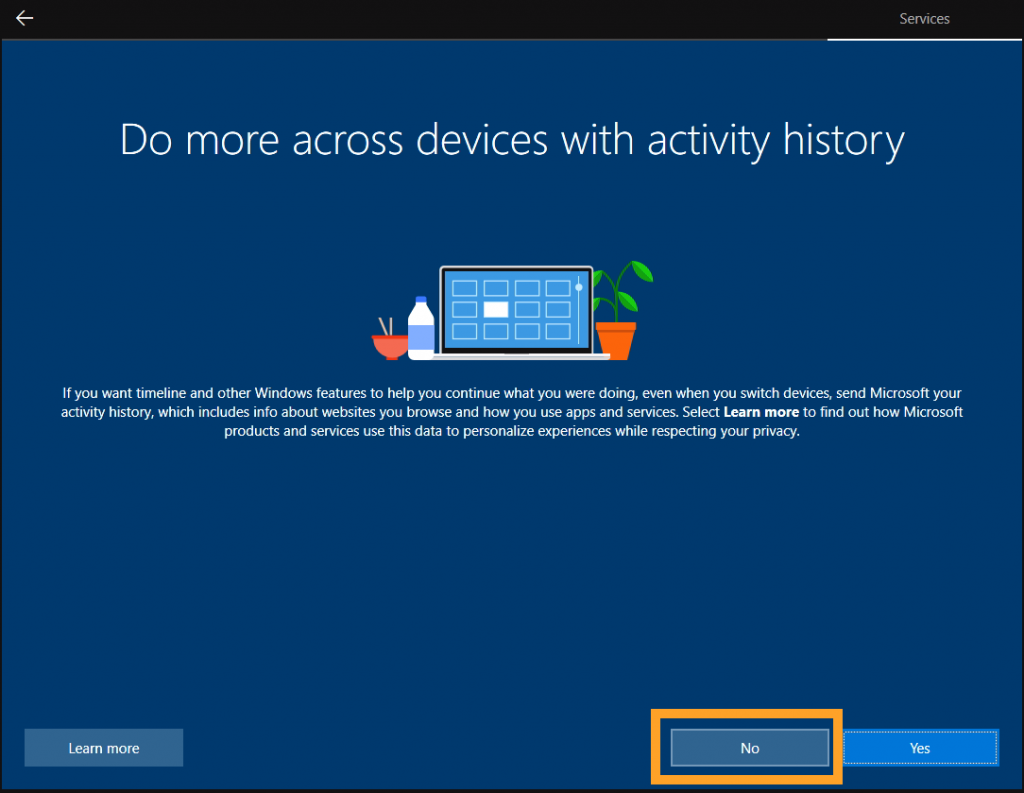
- Unless you signed in with a Microsoft account, click NO on this screen.
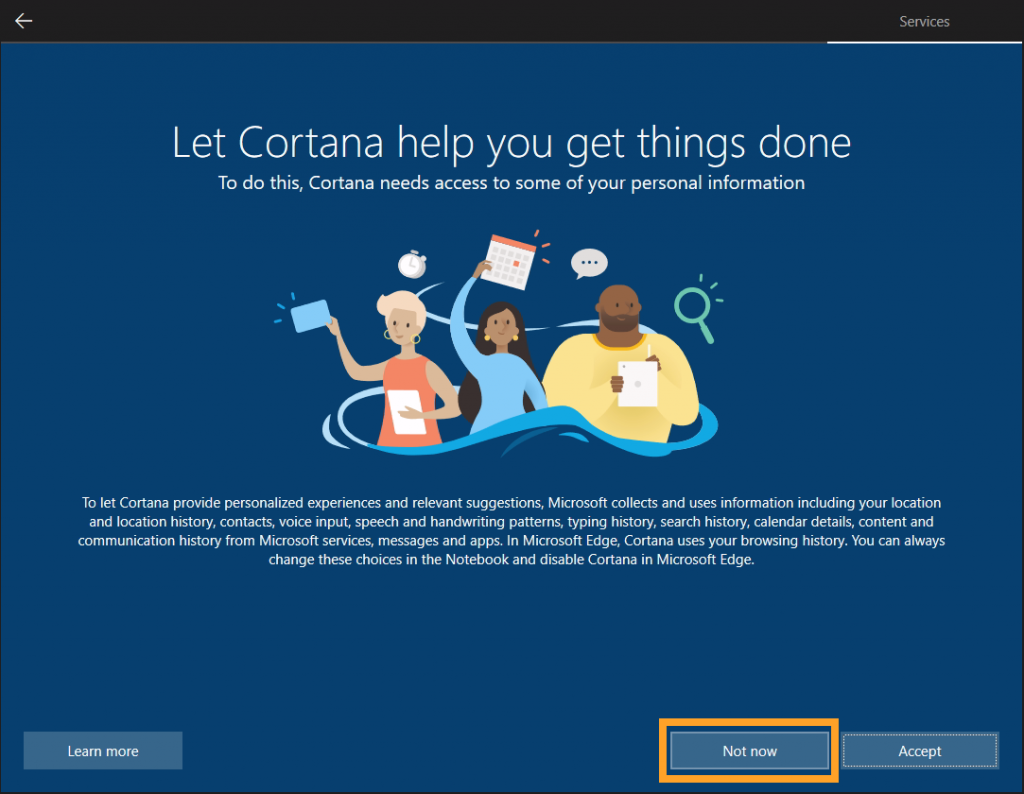
- Cortana is a web search assistant on the desktop. Generally this should be disabled.
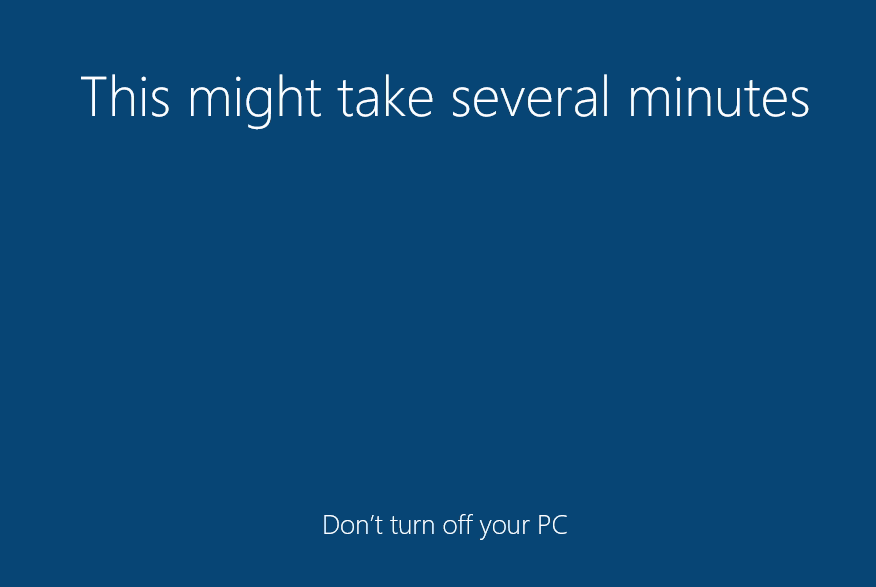
- This loading screen will appear for a few minutes while the user settings are applied.
- When completed, you will go straight to the Windows 10 desktop.
- Your installation is complete!
- If you’re missing any drivers, start by running Windows update. It tends to find most of them. Otherwise, use the search box at the top of this page to find the “Technical Resources” page for your model. It will have a link to the drivers.
Activating Windows
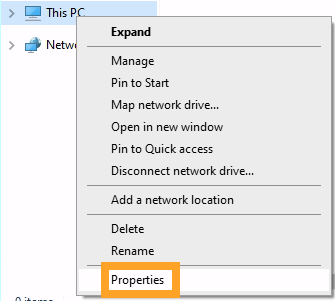
- Open any file explorer window. Right click on “This PC” and choose “Properties”
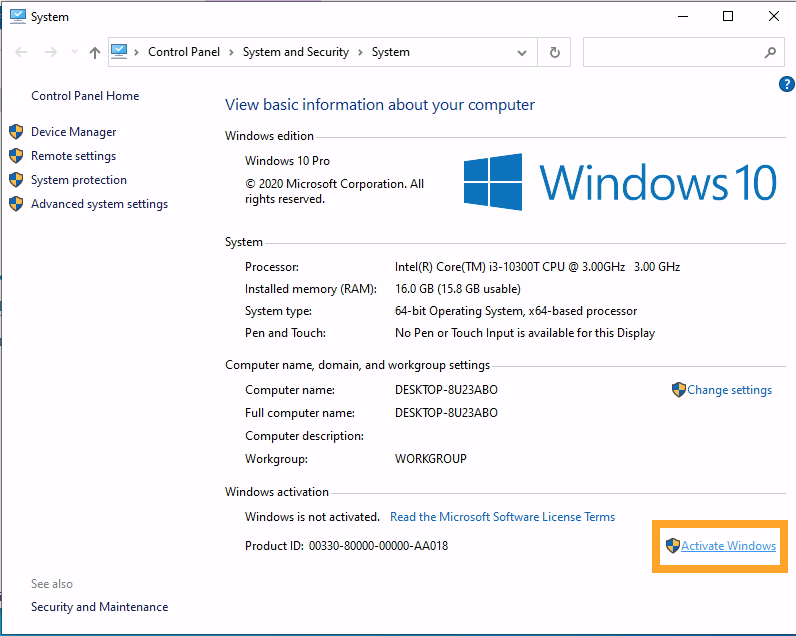
- The activation status is shown at the bottom.
- Click the “Activate Windows” button
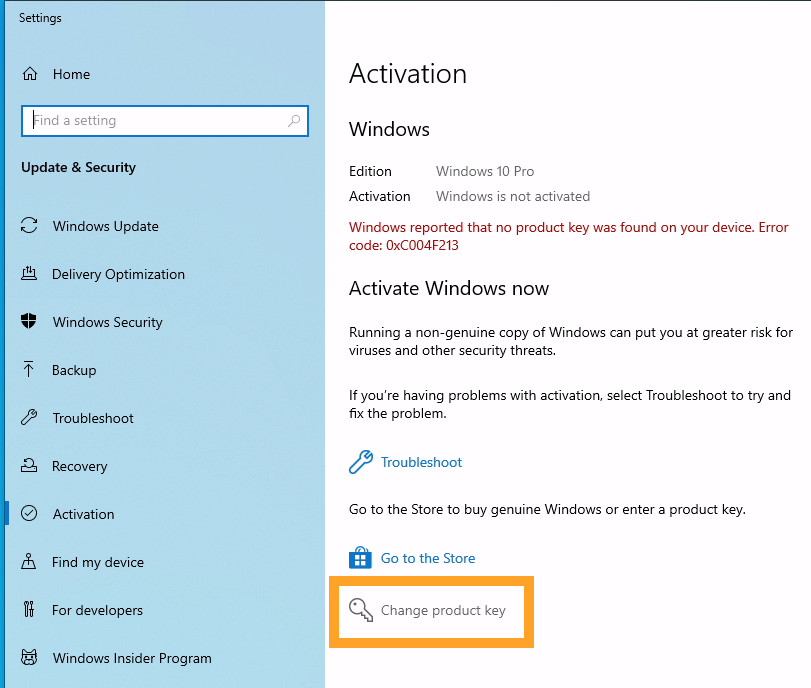
- Click “Change product key”
- Note: Some systems will display an error indicating that a “hardware change” has occurred. This can be ignored, and will go away once the OS is activated.
- Enter the product key from the bottom of your OnLogic PC.
- The key may be obscured by a square patch of silver security foil.
- Very gently, scratch the foil off with your fingernail as you would a lottery ticket. The key is underneath.
- Enter the product key in this window, press Next, and Windows will activate online automatically.