This page also applies to the TM410 ThinManager Ready platform
Documents and Downloads
Manuals
Drivers
Windows 10 Drivers (.EXE)
or Windows 10 INFs (for server deployment, or follow our guide for Device Manager install)
How to Enable Auto Power On for P1101
The P1101 has two options for auto power on. In this section we will go over both with instructions.
Option 1: Hardware
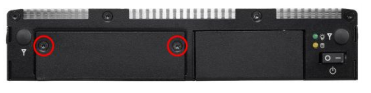
The easiest and most reliable method of enabling auto power on for the P1101 is through the hardware, which uses the switch underneath the panel.
- Remove the two Torx T10 screws
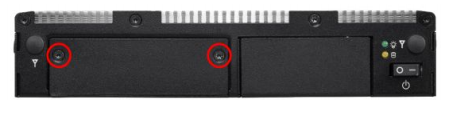
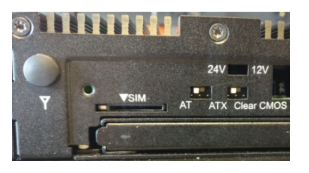
- Slide the AT/ATX switch to the AT position. AT enables auto power on.
The downside of this method is that the power button is completely disabled. If you manually shut down the PC, you will need to cycle power to restart it. If that is an issue for your use case, use option 2 instead.
Option 2: BIOS
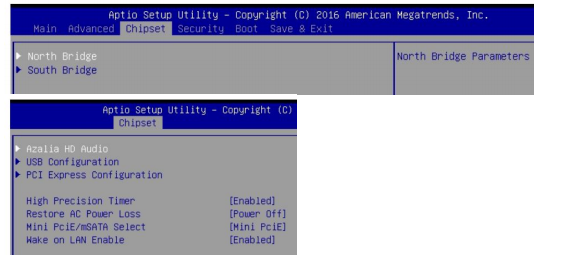
- Power on the system and immediately press the Del key a few times to access the BIOS
- Navigate over to the Chipset tab and open the South Bridge menu
- Change the option Restore AC Power Loss to [Power On]
- Navigate to the Save & Exit tab and choose “Save Changes and Reset”
Disassembly
The P1101 can be opened by the user. This does not void the warranty, however, any damage caused by doing so will not be covered. Some precautions should be taken to avoid damaging the unit:
- Perform this disassembly in an area free of static discharge
- Before beginning, touch a grounded metal surface to discharge your body of static electricity
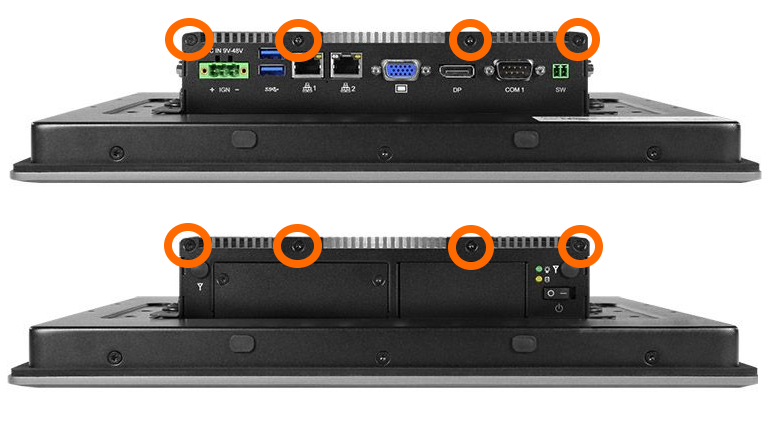
Remove x8 screws from the back/top of the system as indicated. You will need a Torx T10 screwdriver.
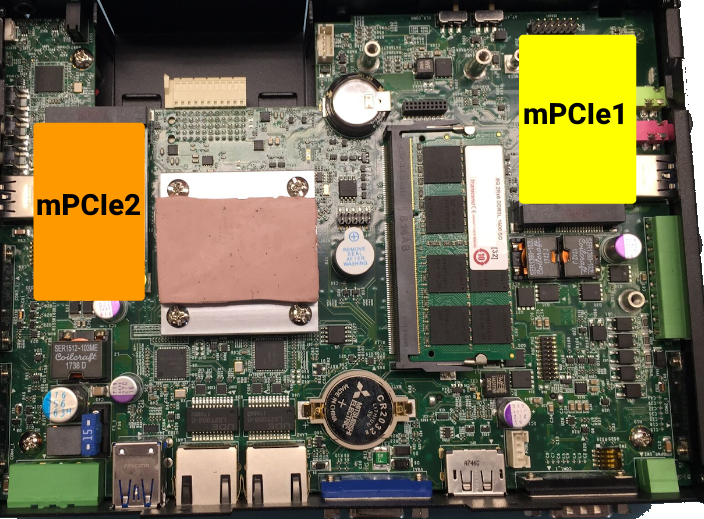
Remove the heatsink lid to gain access to the motherboard.
Troubleshooting
How to Clear CMOS on P1101
If the system fails to power on or otherwise function, clearing the CMOS may help restore it to a working state.
Required tools: T10 Torx driver
- Remove the two Torx T10 screws
- Slide the Clear CMOS switch to the other position
- Wait 30 seconds
- Return the switch to its original position
- The CMOS is now clear
NOTE: The unit may power cycle several times before it boots up. This is normal.