Drivers and Manuals
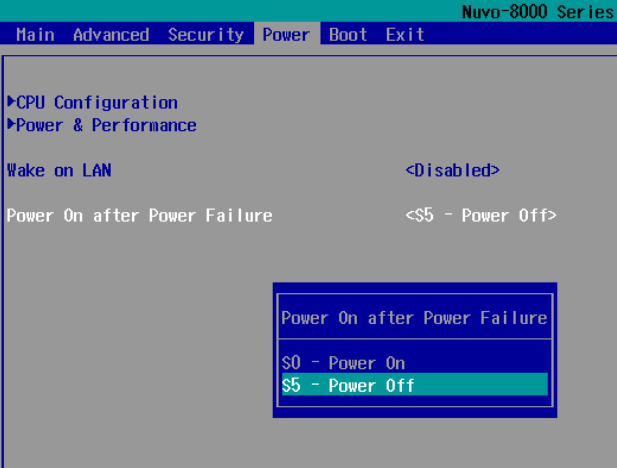
Enabling Auto Power On
The auto power on feature will turn the Helix system back on after a power loss. This can be useful for automatic recovery after a power outage, or applications where the system’s power button is not easily accessible.
- Power on the unit and immediately press the F2 key a few times to access the BIOS.
- Navigate to the Power tab.
- Change the “Power On after Power Failure” option to “S0-Power On”
- Navigate to the Exit tab.
- Save Changes and Exit.
- The unit will now automatically power on when power is connected.
Disassembly
Opening the system does not void the warranty, however any damage caused during opening the system is not covered.
Nuvo-8108GC
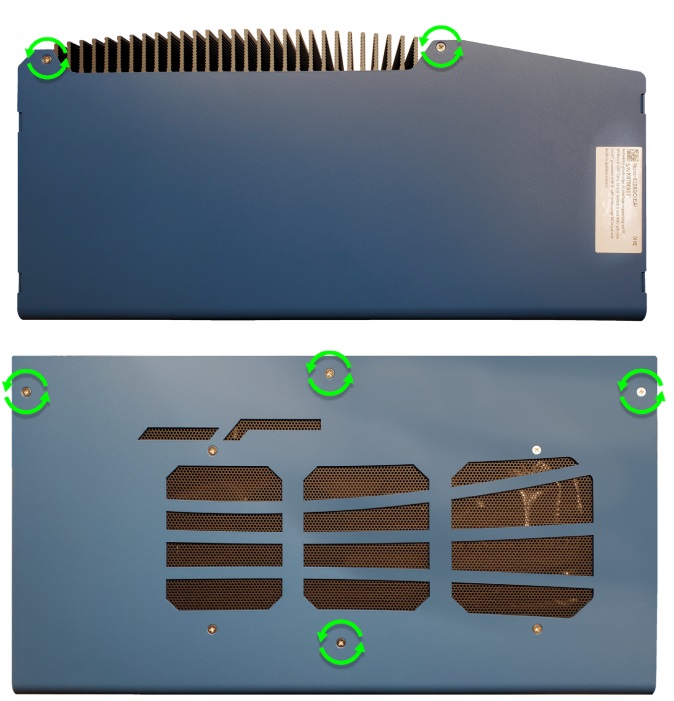
- Unplug the system completely from power and all peripherals
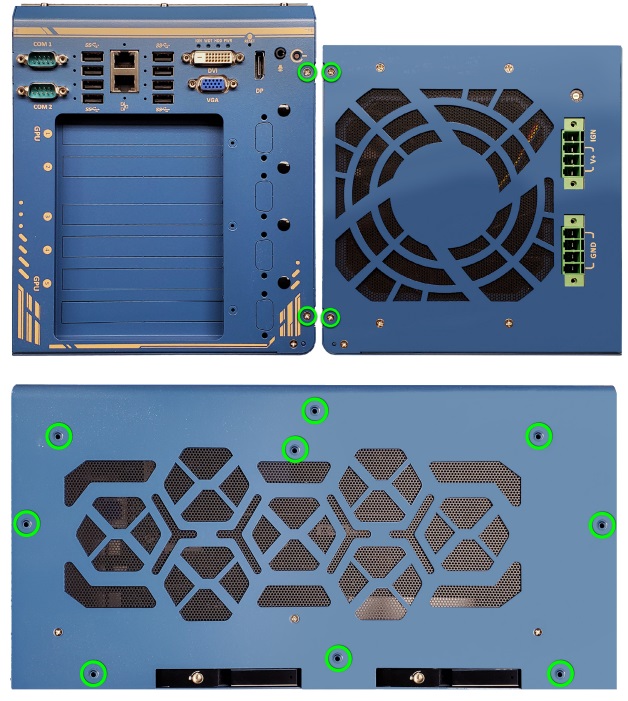
- Remove the screws shown
- Remove the screws shown
- Lift the cover up and then away
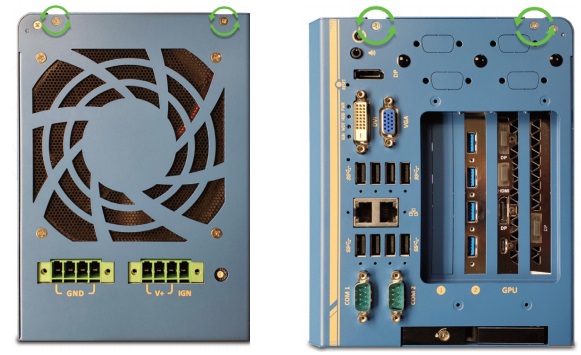
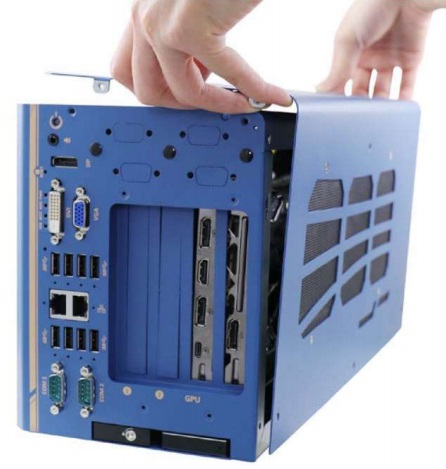
Nuvo-8208GC
- Unplug the system completely from power and all peripherals
- Remove the screws shown

- Gently press inward on the mesh in the spot shown.
- Slide the cover up and away.
Troubleshooting
Clearing the CMOS
If the system fails to power on or is otherwise unresponsive, clearing the CMOS may help. It will also restore the BIOS to factory defaults.
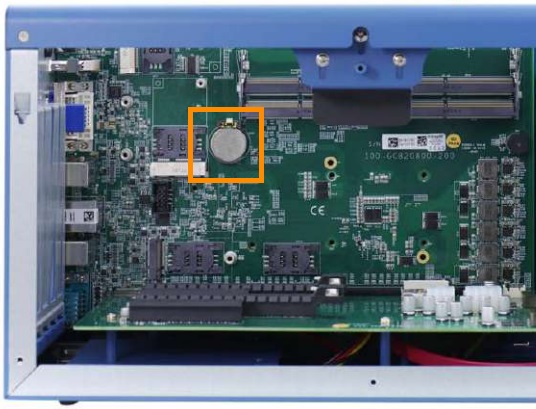
- Follow the Disassembly steps for your system above. Make sure all cables (such as power, video, etc) are disconnected.
- To clear the CMOS, locate and remove the coin cell battery
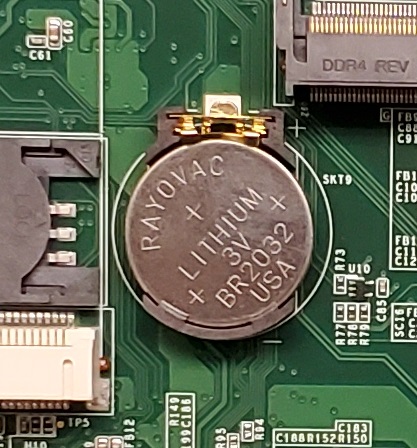
- Leave the battery out of the system for 5 minutes and then reinstall it.
- The CMOS has now been cleared. The system may reboot several times to reconfigure itself. Be patient when powering it back on.
Display Troubleshooting / Changing the primary display
By default, the system should be configured to output video out of the graphics card (If equipped). If no video is outputted from the graphics card, try using the onboard DisplayPorts instead. If that works, use the steps below to change the primary display.
- Power on the unit and immediately press the F2 key a few times to access the BIOS.
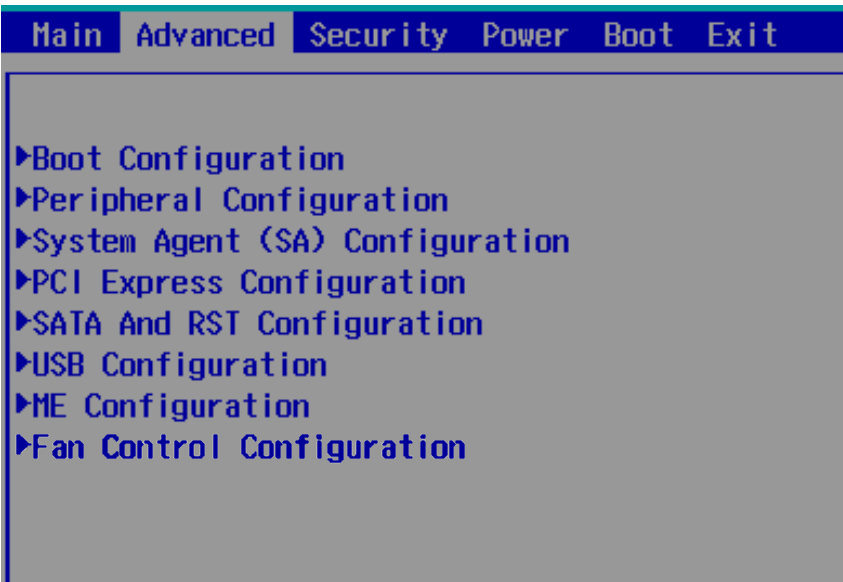
- Navigate to the Advanced tab.
- Open the “System Agent (SA) Configuration” menu
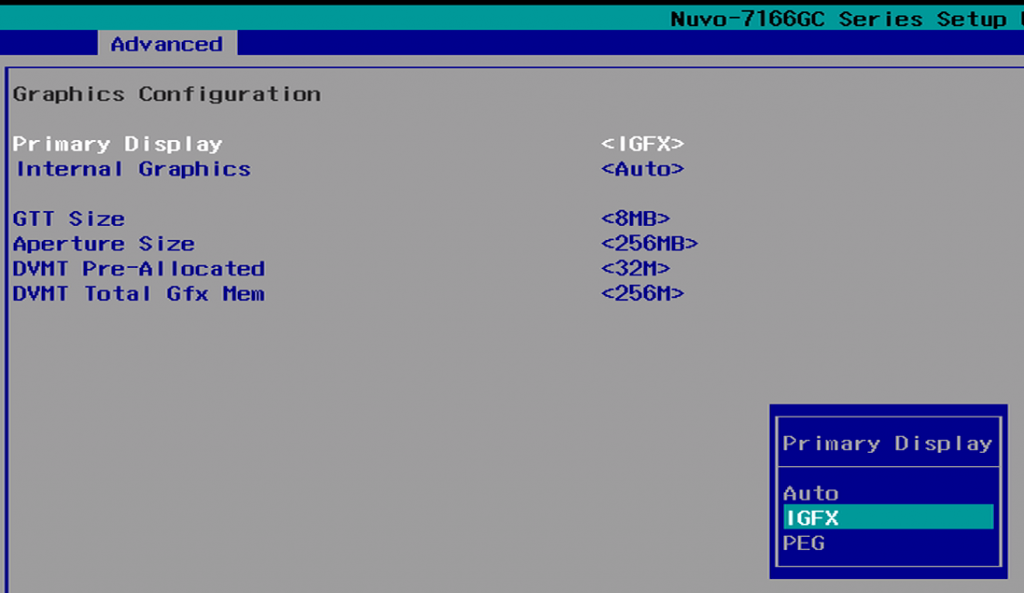
- Open the “Graphics Configuration” menu
- Change the “Primary Display” to IGFX to use the motherboard graphics, change to PEG to use the graphics card
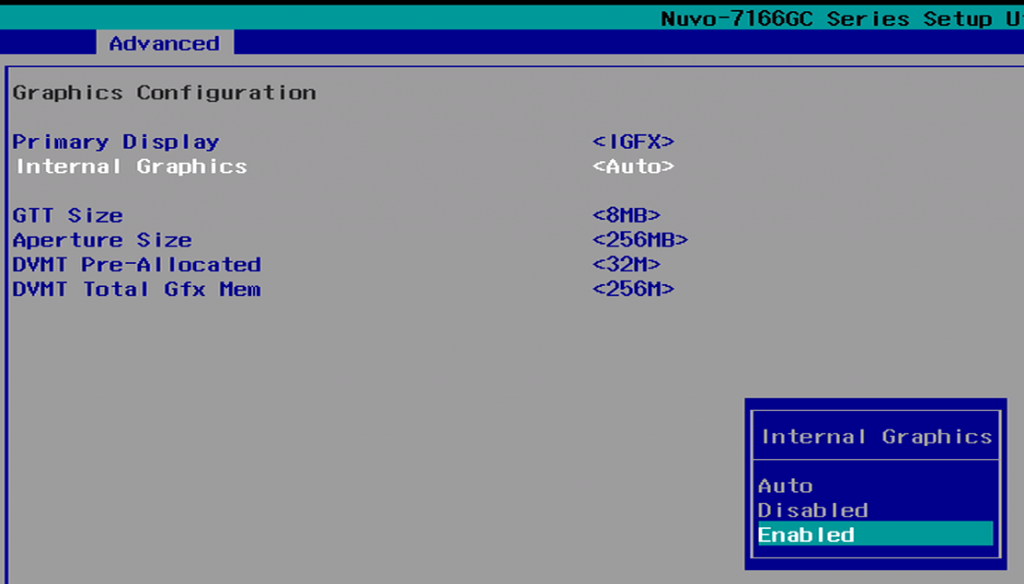
- If desired, set “Internal Graphics” to Enabled to utilize both the graphics card and onboard outputs.
- Navigate to the Exit tab.
- Save Changes and Exit.