The NC100 can be opened by the user. This does not void the warranty, however, any damage caused by doing so will not be covered.
The following steps will walk you through auto-powering on your NC100 and opening the case to clear CMOS.
How to Enable Auto Power On for NC100
- Power on the unit and press the F2 key a few times to access the BIOS
- Click the Advanced button
- Click on the Power tab
- Locate the After Power Failure option and change it to Power on
- Click the X
- Click Yes to save changes
- Auto power on is now enabled


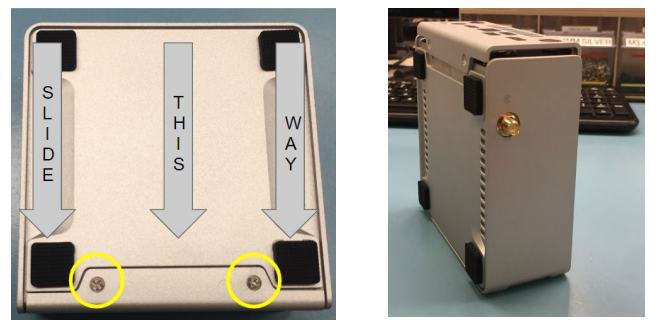
Opening the NC100 Case
- Remove the two Phillips screws from the bottom of those case and slide the lid off
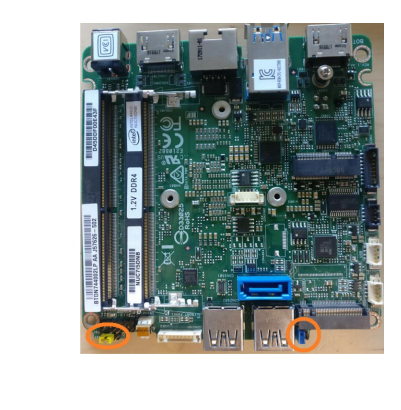
- Remove the 4x motherboard screws shown in the red arrows below and flip the motherboard out of the case

- Remove the blue jumper and install it onto both pins
- Wait approximately 30 seconds
- Reinstall the jumper on a single pin
- The ME, MEBX, and AMT settings have been reset
- Remove the yellow jumper
- With the jumper removed, power on the system
- It should display a recovery menu in approximately 30 to 60 seconds if successful
- Power down and reinstall the jumper in the 1-2 position


Attaching Wall and DIN Rail Mounts to NC100
- Remove the rubber adhesive feet from the bottom of the case to reveal the mounting holes

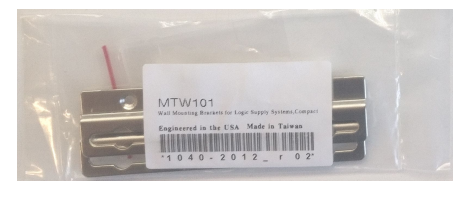
- Remove the mounting hardware from the packaging
Note: Wall mounting will use only the MTW101, DIN mounting will use both.

- Attach the wall mountings brackets to the system
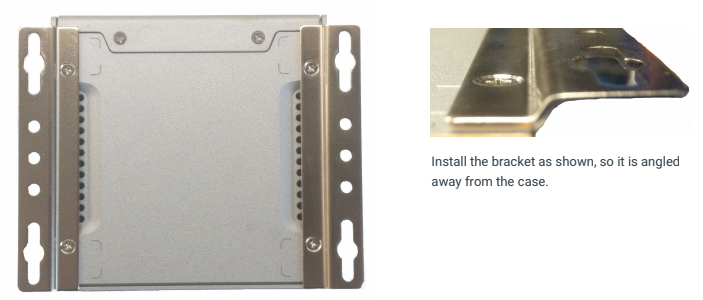
- If you are not using DIN clips, stop here. The wall mounting brackets are fully installed and ready to use.
DIN Clip Installation
- Install the DIN clips to the wall mounting brackets using the included screws.
- Use a very low torque setting and do not over tighten the screws. They will thread into the plastic with minimal force and that will hold them in place.


Drivers for the NC100
Visit the following link to download drivers for your NC100 unit:
https://drive.google.com/drive/folders/1V9TQK-vowak_LRKWRhifT_uX3rbkRDQs
Attaching the MTV100 VESA mounting bracket
- Remove the rubber adhesive feet from the bottom of the case to reveal the mounting holes
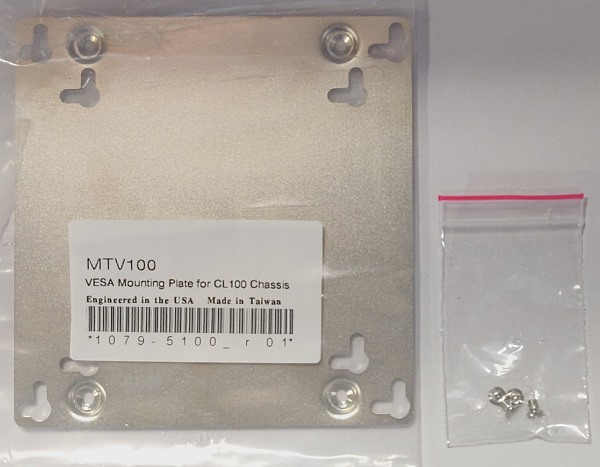
- Remove the mounting hardware from the packaging

- Using the included screws, attach the VESA plate to the bottom of the system.

- Grab the 4x VESA mounting screws from the accessory kit

- Locate the mounting holes on the rear of your monitor
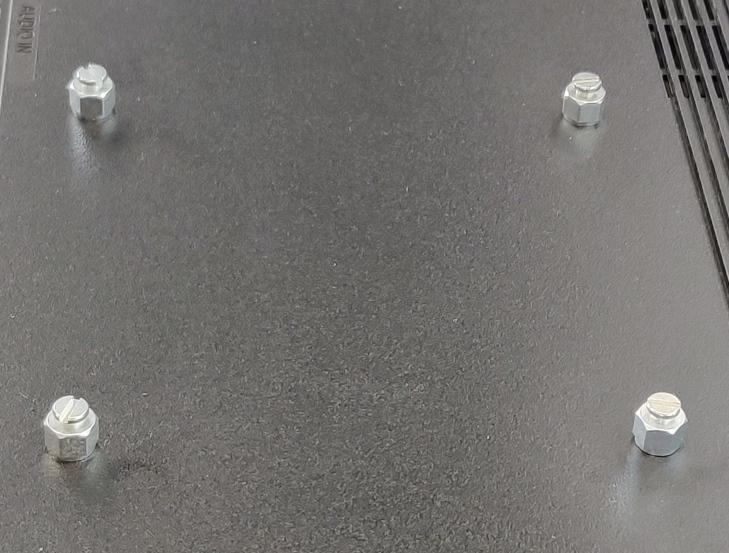
- Install the mounting screws hand tight

- Poke the VESA screw heads through the holes in the bottom of the mounting plate.
- Slide the system down and it will drop into place.

- Final installation shown.