Documentation Index
Select a model of ML600 from the contents pane on the right to view the technical resources. The model number can be found on the bottom of the unit.
Opening the case
The ML600 can be opened by the user. This does not void the warranty, however, any damage caused by doing so will not be covered.
Before getting started, ensure your body is discharged of any static electricity by touching a grounded metal surface.
- Begin by removing the 6x Phillips case screws indicated by the green arrows below.
- On certain configurations, the COM port standoffs also hold the backplate in place. Remove the 5mm hex standoffs indicated by the purple arrows if needed.
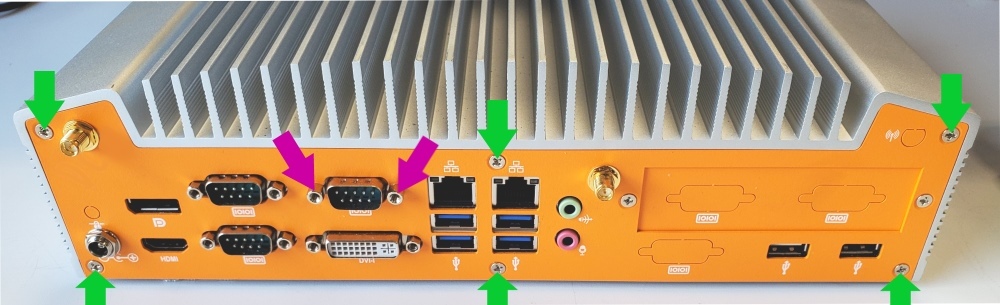
- Remove the 4 phillips screws from the bottom of the unit.
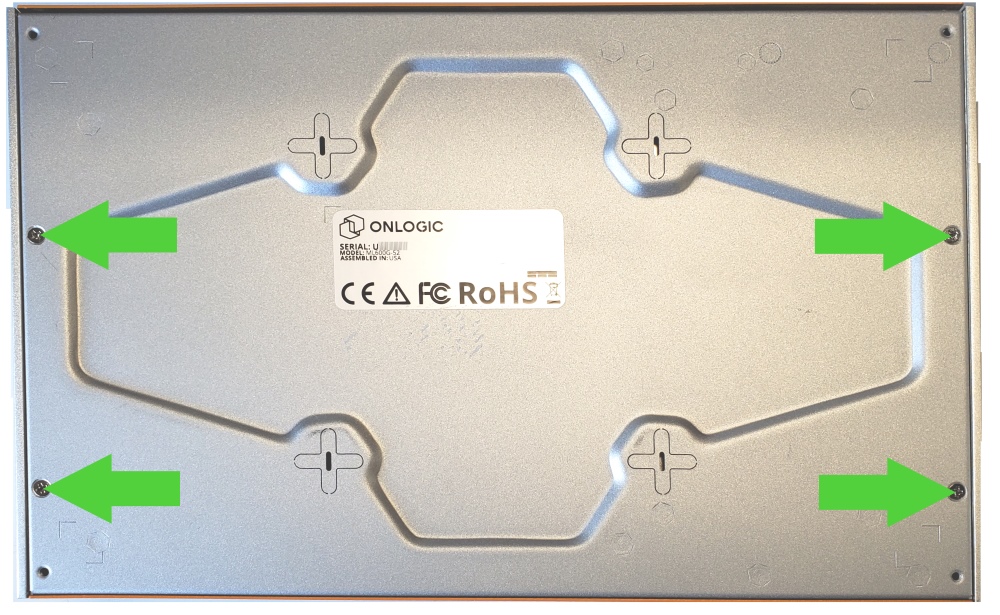
- The backplate is now loose. Remove it slowly and carefully. It may still have wires attached depending on your configuration.
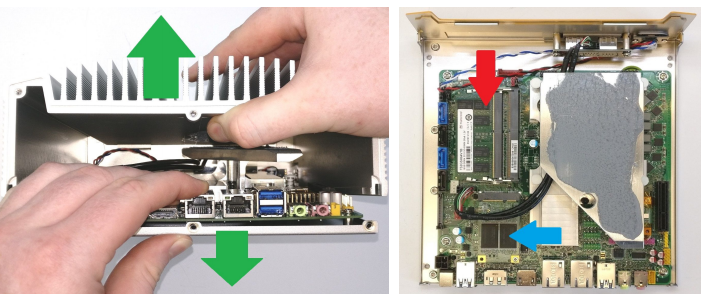
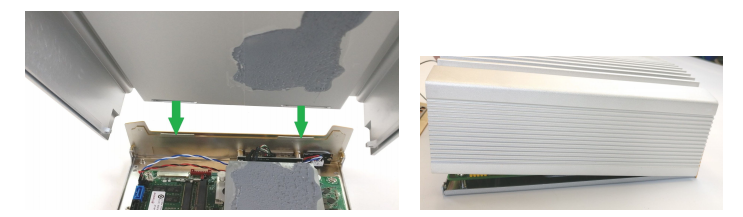
- Insert a flathead screwdriver into the ridge between the internal heatblock and lid. Rotate the screwdriver to pop them apart. They are held together by thermal paste. Moderate force is required to pop them apart.
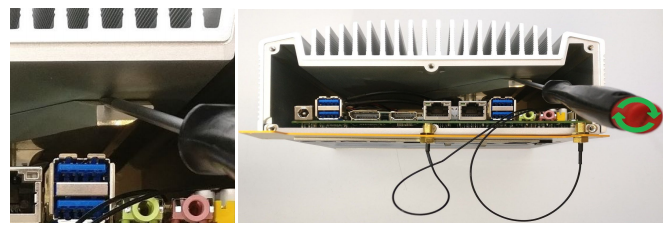
- The lid can now be removed from the system. Pull the lid and system apart from one another.
- You now have full access to the components, including the RAM (red arrow) and SSD (blue SSD).
Model Specific Troubleshooting
The following pages outline common service tasks performed on the ML600 and are broken out by model number, which can be found on the bottom of your unit.
ML600G-10
ASRock C2750D41 Motherboard
Drivers
https://www.asrockrack.com/general/productdetail.asp?Model=C2750D4I#Download
Motherboard Manual
https://drive.google.com/open?id=1zHg80LnocLnCXzwGvP3ma95yhkJx3Hjz
How to Enable Auto Power On
- Power on the unit and press the F2 key to access the BIOS
- Navigate to the IntelRCSetup tab
- Open the South Bridge Chipset Configuration menu
- Change “Restore on AC/Power Loss” to [Power On]
- Save changes and exit from the Exit menu
- Auto power on is now enabled
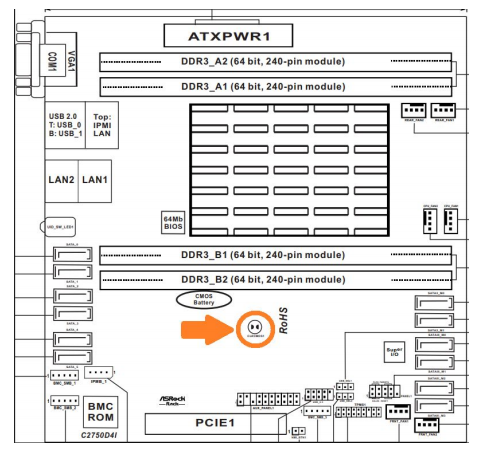
How to Clear CMOS
- Locate the clear CMOS pads
- Short the two metal halves with a flathead screwdriver for 30 seconds
- The CMOS is now clear
ML600G-30
Mitac PH12LI Motherboard
Drivers
https://drive.google.com/open?id=1gzxFagz3ZWfDi7afXqg9SFpeFZNGZD9Q
Motherboard Manual
https://drive.google.com/open?id=1bzQaAOVbpb5lNdC_R3T7dWNgOoBhc44F
How to Enable Auto Power On
- Power on the unit and press the Del key to access the BIOS
- Navigate to the Chipset tab
- Open the PCH-IO Config menu
- Change “State After G3 to S0
- Save changes and exit
- Auto power on is now enabled
How to Clear CMOS
- Locate the CMOS battery
- Carefully disconnect the white connector
- Wait 5 minutes
- Reconnect the white connector
- The CMOS is now clear
ML600G-50
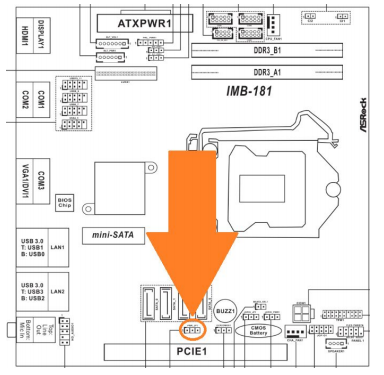
ASRock IMB-181 Motherboard
Drivers
https://drive.google.com/open?id=1RI7U0gtxFDJszG4u98IqBHzVZWDxqriS
Motherboard Manual
https://drive.google.com/open?id=1EEqC6MkbraYCqk09deqnIDuPy6TWktuU
How to Enable Auto Power On
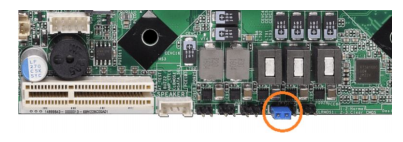
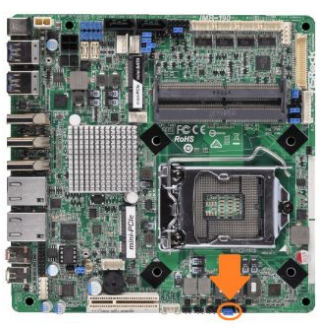
- Locate the AT/ATX jumper
- Move it over by 1 pin
- Auto power on is now enabled
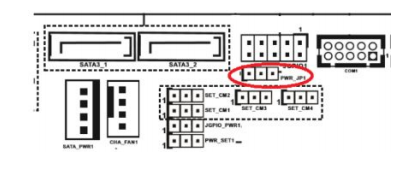
How to Clear CMOS
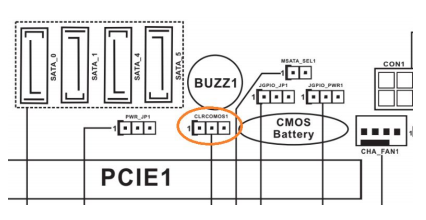
- Locate the CLRMOS1 jumper
- Move the jumper over by 1 pin
- Wait 30 seconds
- Restore the jumper to its original position
- The CMOS is now clear

ML600G-51
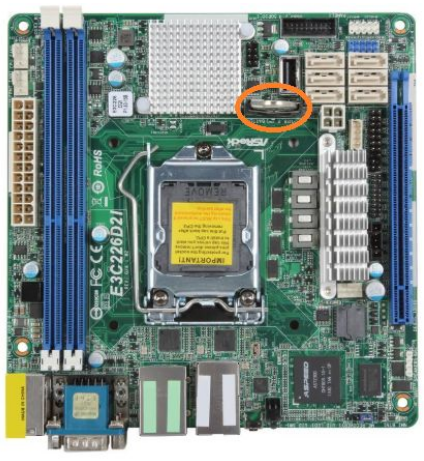
ASRock E3C226D21 Motherboard
Drivers
https://drive.google.com/open?id=1u68Rw9G7YfK4tV1FTj1N_fljHAdrO6AX
Motherboard Manual
https://drive.google.com/open?id=1BCEGGI-su3B52j6rcawkLQbWxH8BmAN4
How to Enable Auto Power On
- Power on the unit and press the F2 key to access the BIOS
- Navigate to the Advanced tab
- Open the South Bridge Configuration menu
- Change “Restore on AC/Power Loss” to [Power On]
- Save changes and exit from the Exit menu
- Auto power on is now enabled
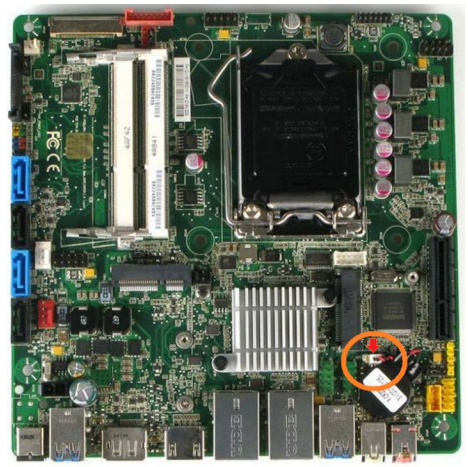
How to Clear CMOS
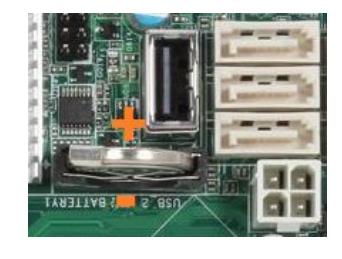
- Locate the CMOS battery
- Carefully remove it from the holder
- Wait 5 minutes
- Reinsert the battery
- The CMOS is now clear
ML600G-52
ASRock IMB-190 Motherboard
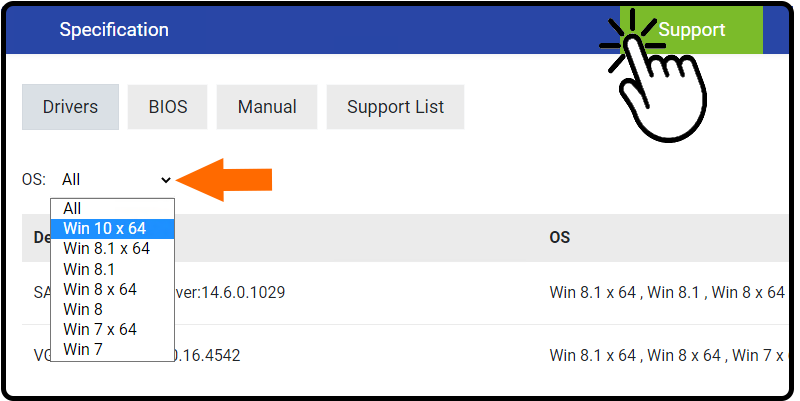
Drivers
https://www.asrockind.com/en-gb/IMB-190
Select “Support” on the blue banner, then select your OS version:
Motherboard Manual
https://drive.google.com/open?id=1q4CPQ7S7zym-m_JeTm4NLT-CmkGgG5jY
How to Enable Auto Power On
- Locate the AT/ATX jumper
- Move it over by 1 pin
- Auto power on is now enabled

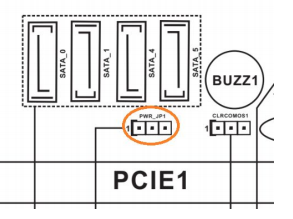
How to Clear CMOS
- Locate the CLRMOS1 jumper
- Move the jumper over by 1 pin
- Wait 30 seconds
- Restore the jumper to its original position
- The CMOS is now clear
Reassembly
To re-assemble the unit, use the following instructions:
- Align the indents in the lid with the tabs on the frontplate
- Install the lid with a straight, downward motion, making sure the tabs stay aligned
- Align the backplate with the rear I/O. The silver EMI tabs may block some of the ports. Use a flathead screwdriver to push the tabs above the ports. Reinstall all the Phillips screws and the process is complete.