Documentation Index
Select a model of ML500 from the contents pane on the right to view the technical resources. The model number can be found on the bottom of the unit.
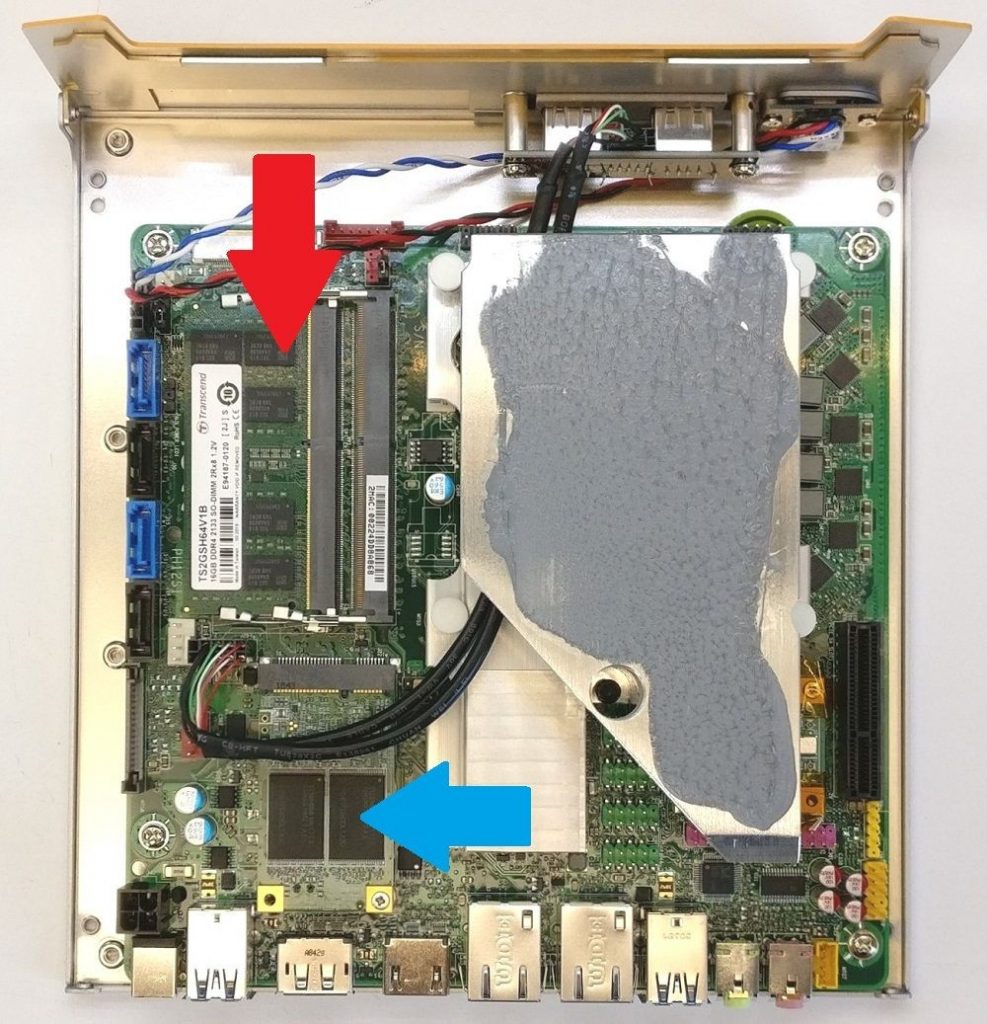
Opening the case
The ML500 can be opened by the user. This does not void the warranty, however, any damage caused by doing so will not be covered.
- Ensure your body is discharged of any static electricity by touching a grounded metal surface.
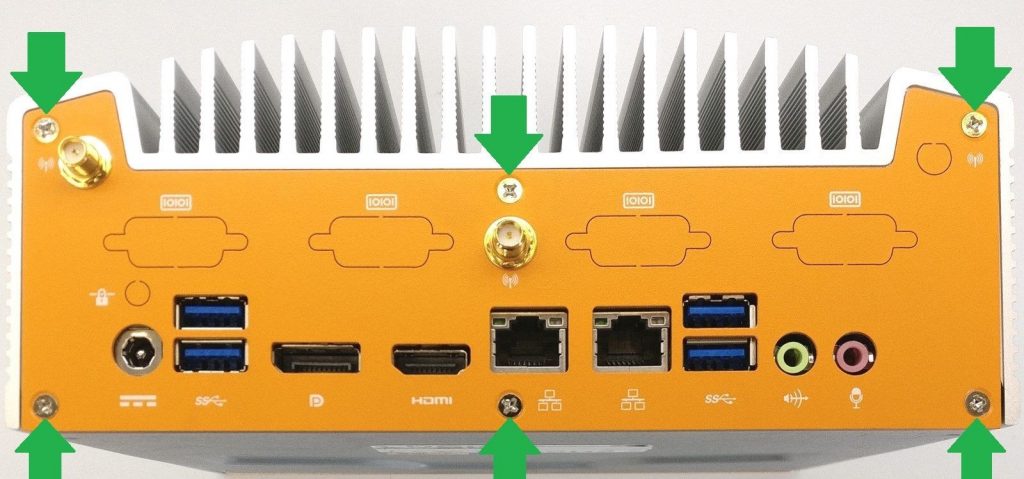
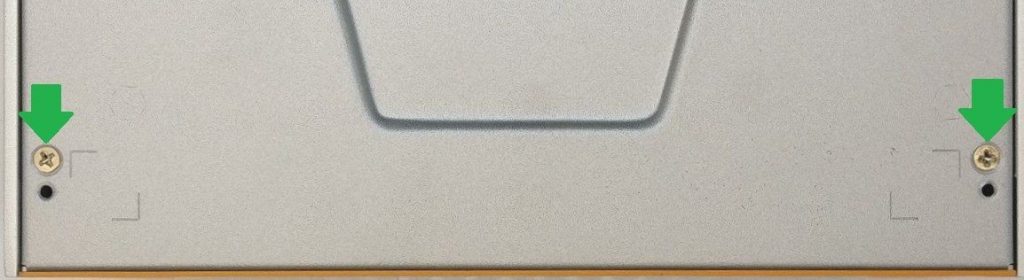
- Begin by removing the 8x Phillips case screws indicated by the green arrows.

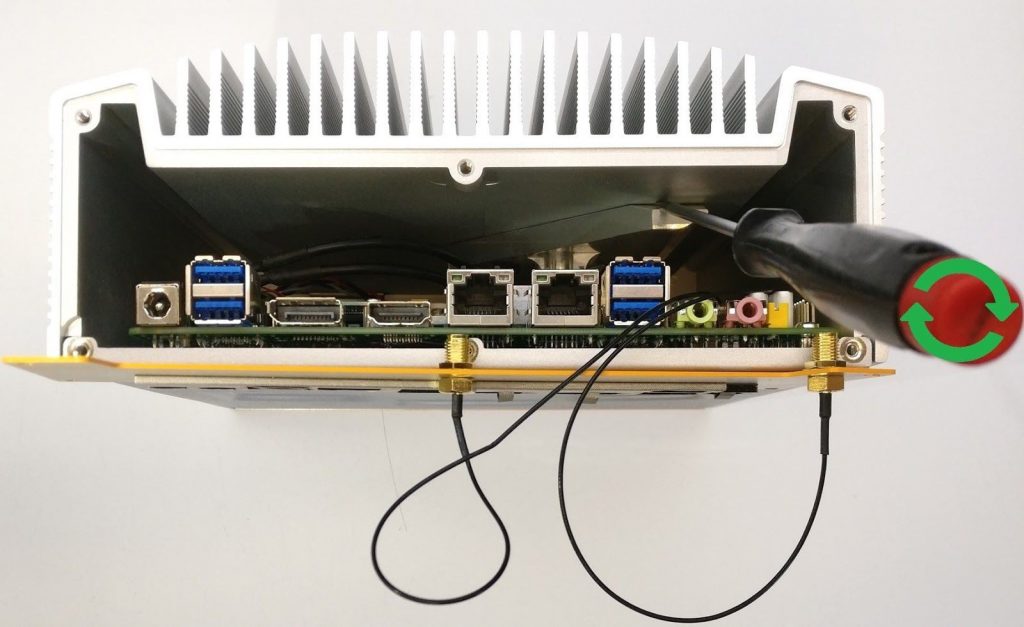
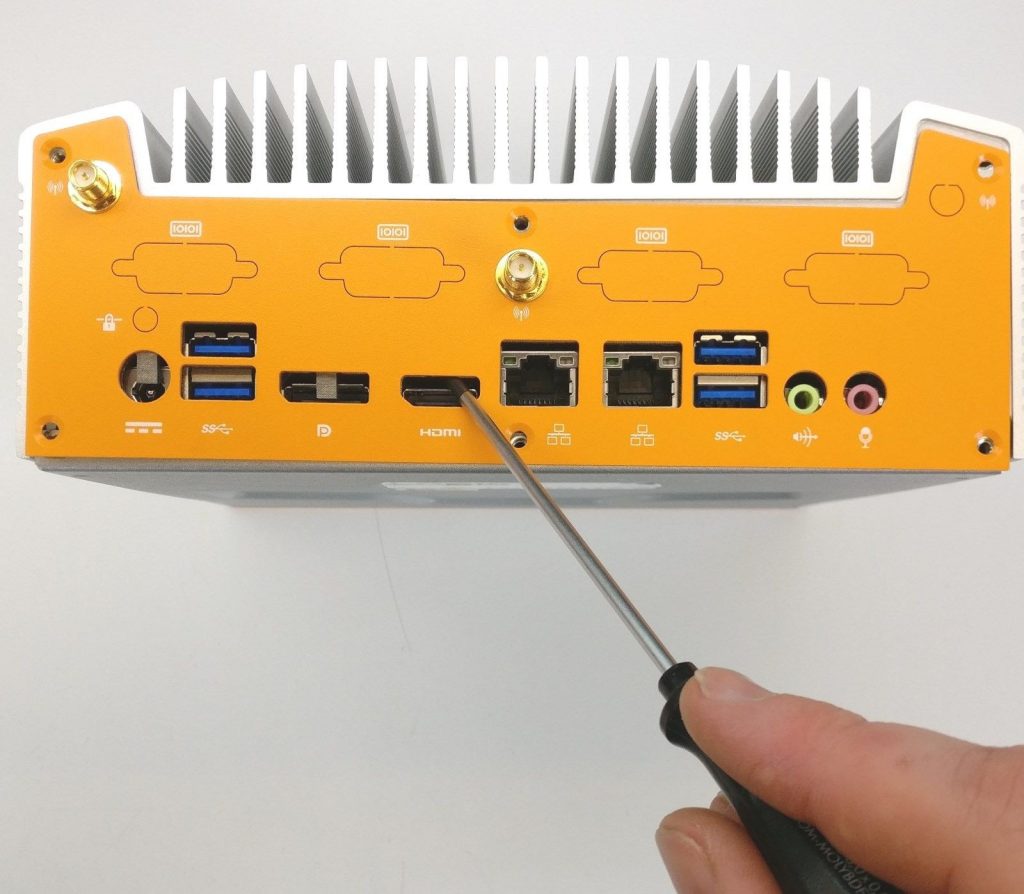
- Insert a flathead screwdriver into the ridge between the internal heatblock and lid.
- Rotate the screwdriver to pop them apart. They are held together by thermal paste. Moderate force is required to pop them apart.
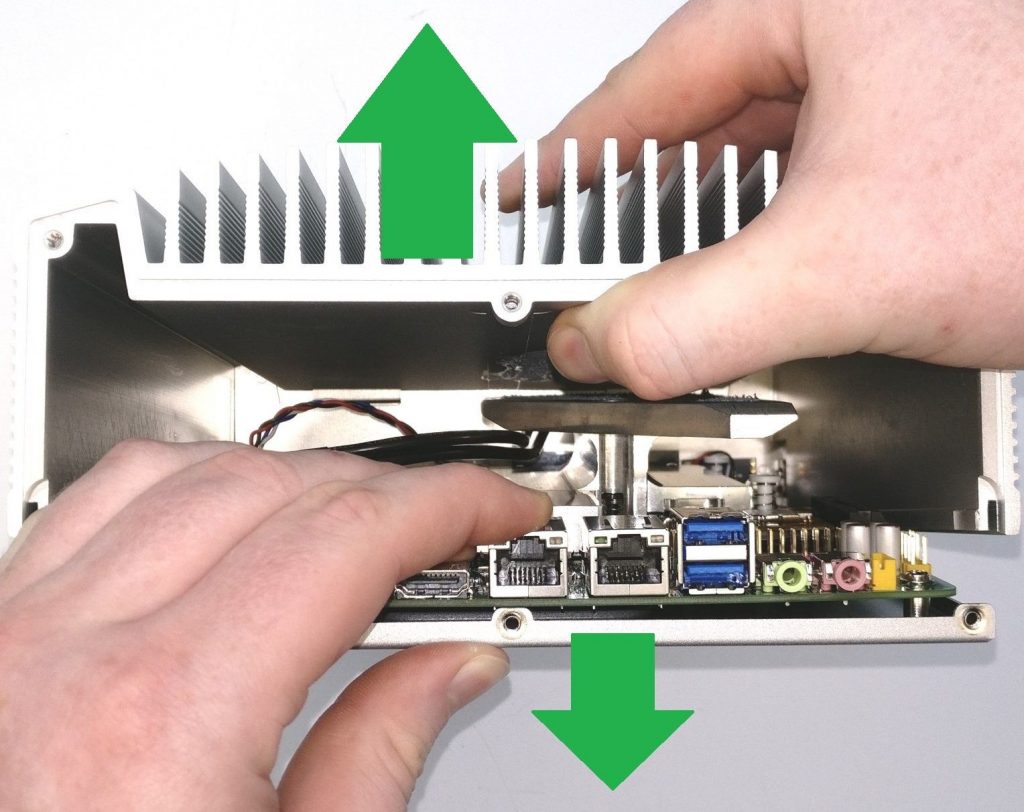
- The lid can now be removed from the system. Pull the lid and system apart from one another.
- You now have full access to the components, including the RAM and SSD.
ML500G-30
Mitac PH12SI-I motherboard
Drivers
https://drive.google.com/open?id=1h6whiW3LAtlNTqRVTpeoRP7ycZVy4Vxc
Product Manual
https://drive.google.com/open?id=1ooJePYQVd1qTLvw9L8c0Q3RT2IqbrwIk
Enable Auto Power On
● Power on the unit and press the Del key to access the BIOS
● Navigate to the Chipset tab
● Open the PCH-IO Config menu
● Change “State After G3” to S0
● Save changes and exit
● Auto power on is now enabled
Motherboard Reset (Clear the CMOS)
Disconnect the system from all wire connections (power, ethernet, video, etc), then:
- Locate the clear CMOS jumper
- Move the jumper over by 1 pin
- Wait 30 seconds
- Restore the jumper to its original position
- The CMOS is now clear
ML500G-50
ASRock IMB-195 motherboard
Drivers
https://drive.google.com/open?id=17HrQDHq6T1wK0dzS8-3OCSR1bVE6aGLU
Product Manual
https://drive.google.com/open?id=1g7NyI6-hXZ1iYa8jDsf3G4mKI0D7mm9S
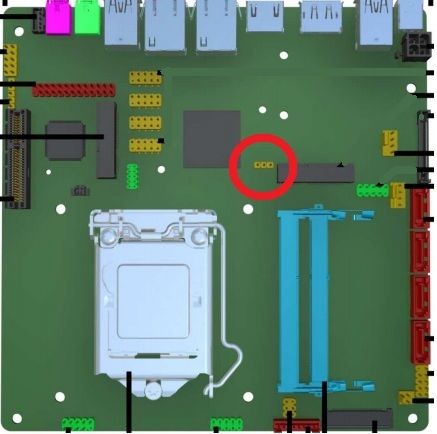
Enable Auto Power On
Disconnect the system from all wire connections (power, ethernet, video, etc), then:
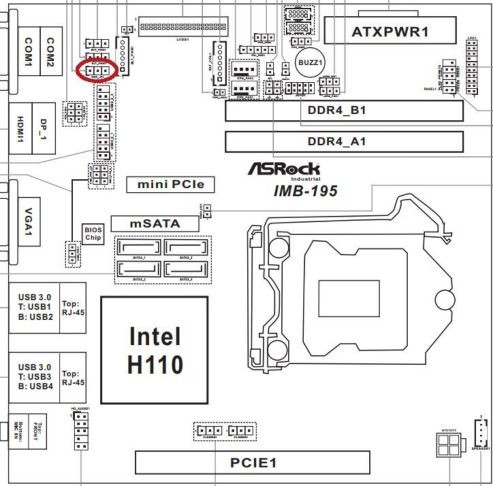
- Locate the AT/ATX jumper
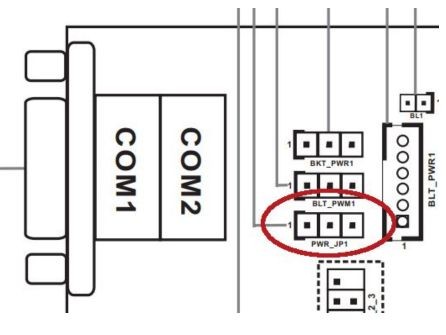
- Move the jumper over by 1 pin
- Auto power on is now enabled
Motherboard Reset (Clear the CMOS)
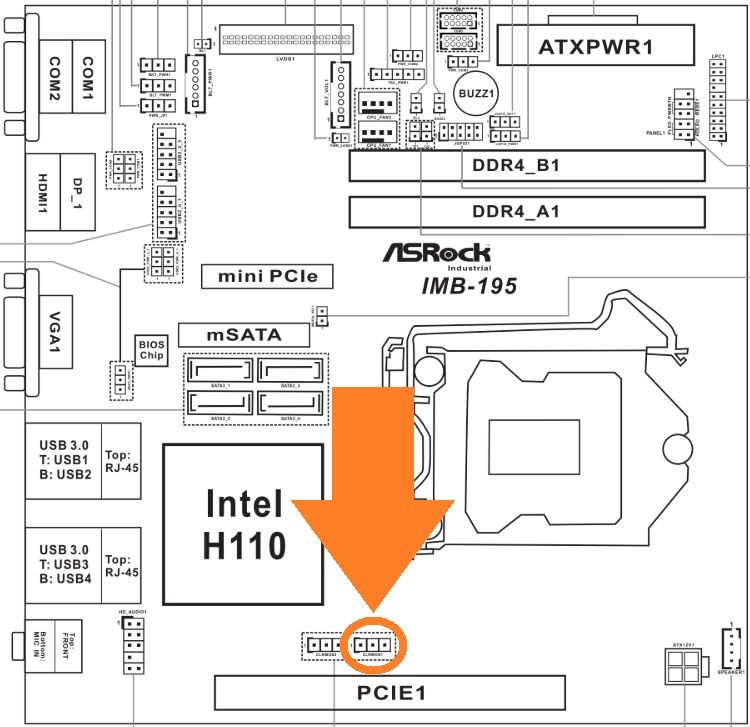
- Locate the CLRMOS1 jumper
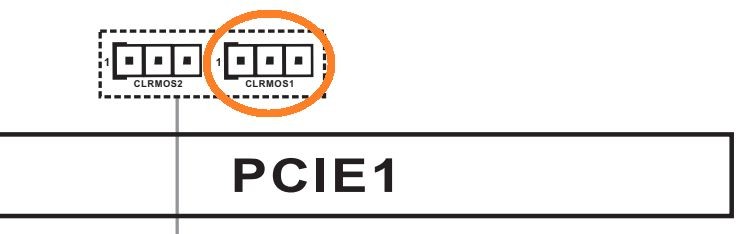
- Move the jumper over by 1 pin
- Wait 30 seconds
- Restore the jumper to its original position
- The CMOS is now clear.
ML510G-50
ASRock IMB-1214 motherboard
Drivers
Quick Install (EXE): https://www.asrockind.com/IMB-1214
Manual/Server Install: Download here
Product Manual
http://download.asrock.com/IPC/Manual/IMB-1214.pdf
Enable Auto Power On
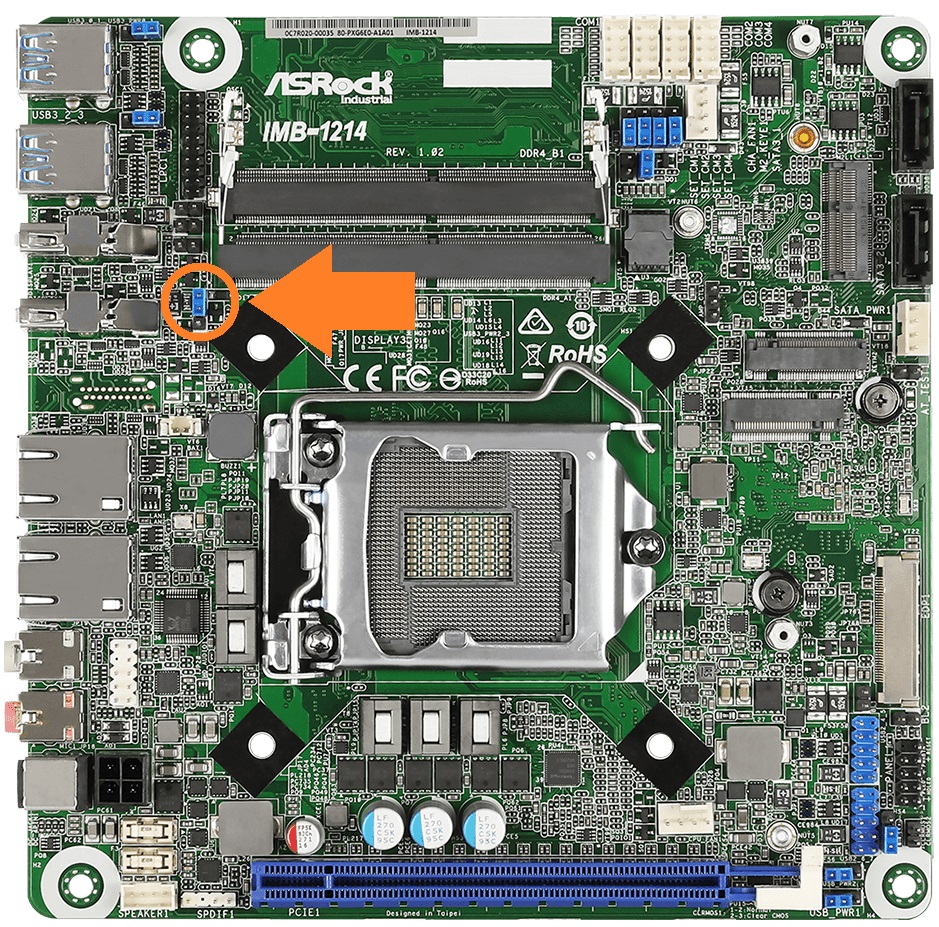
- Locate the AT/ATX jumper
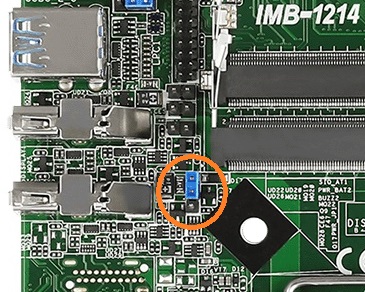
- Move the jumper over by 1 pin
- Auto power on is now enabled
Motherboard Reset (Clear the CMOS)
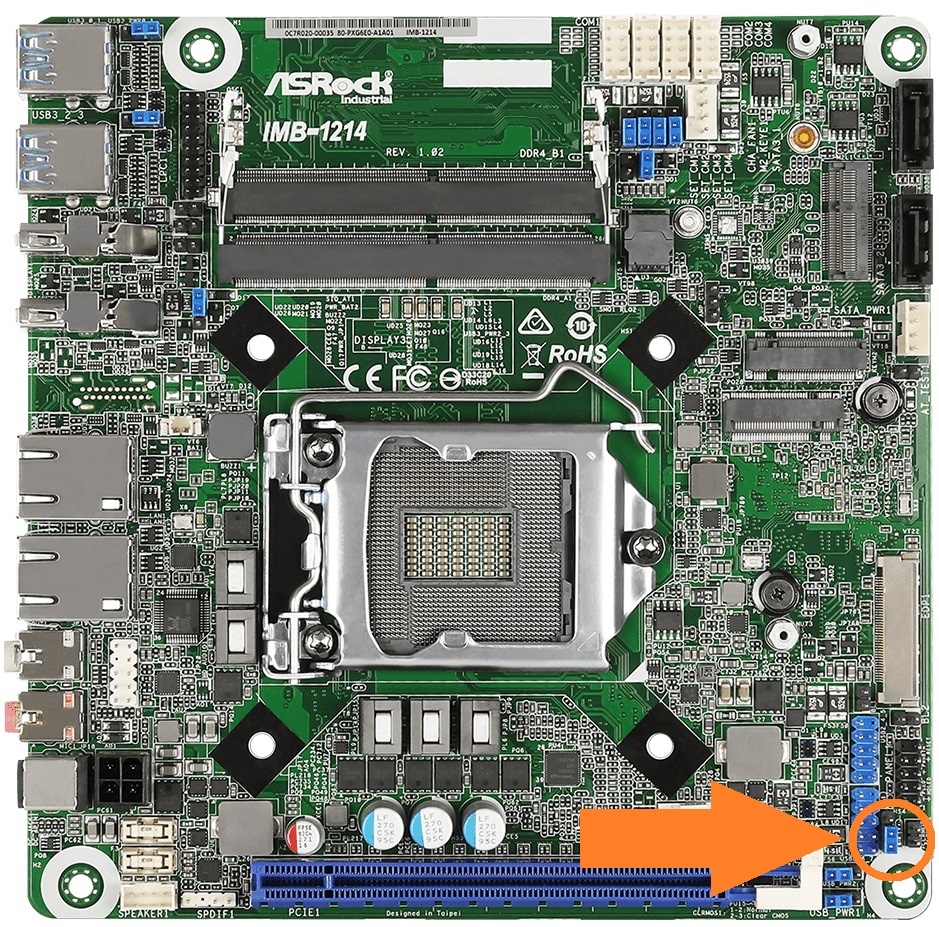
- Unplug the system completely from power and all peripherals
- Locate the CLRMOS1 jumper
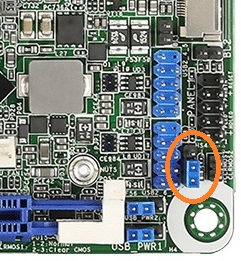
- Move the jumper over by 1 pin
- Wait 30 seconds
- Restore the jumper to its original position
- The CMOS is now clear.
Reassembly
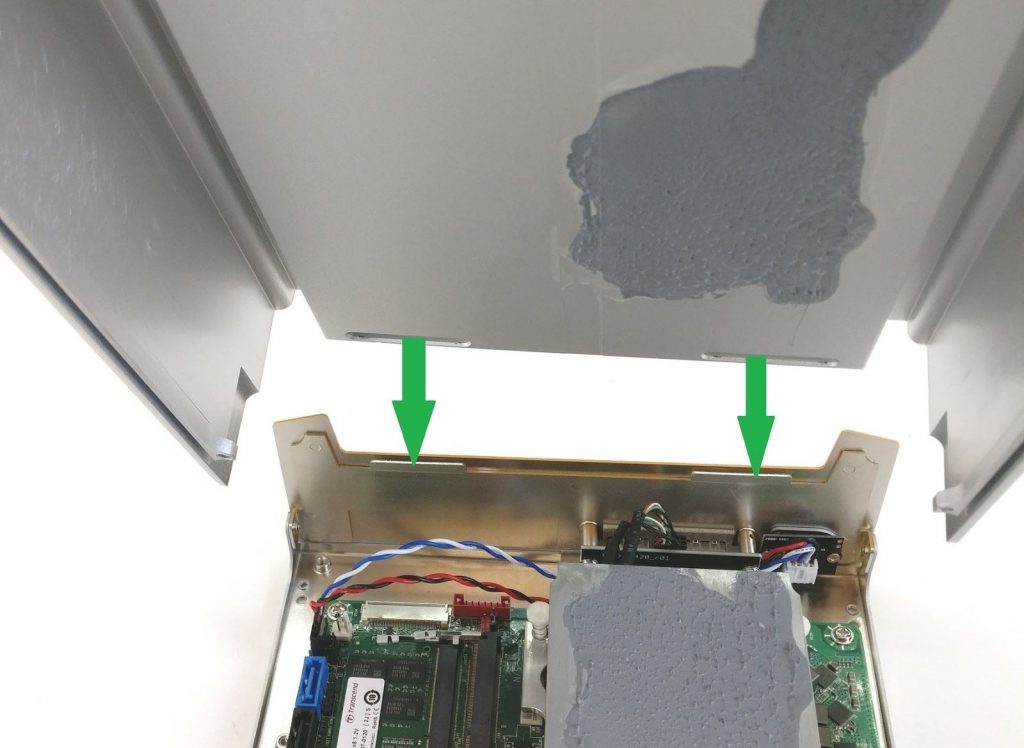
- Align the indents in the lid with the tabs on the frontplate.
- Install the lid with a straight, downward motion, making sure the tabs stay aligned.

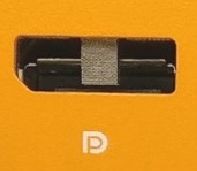
- Align the backplate with the rear i/o.
- The silver EMI tabs may block some of the ports.
- Use a flathead screwdriver to push the tabs above the ports.
- Reinstall all the Phillips screws and the process is complete.
VESA Mounting
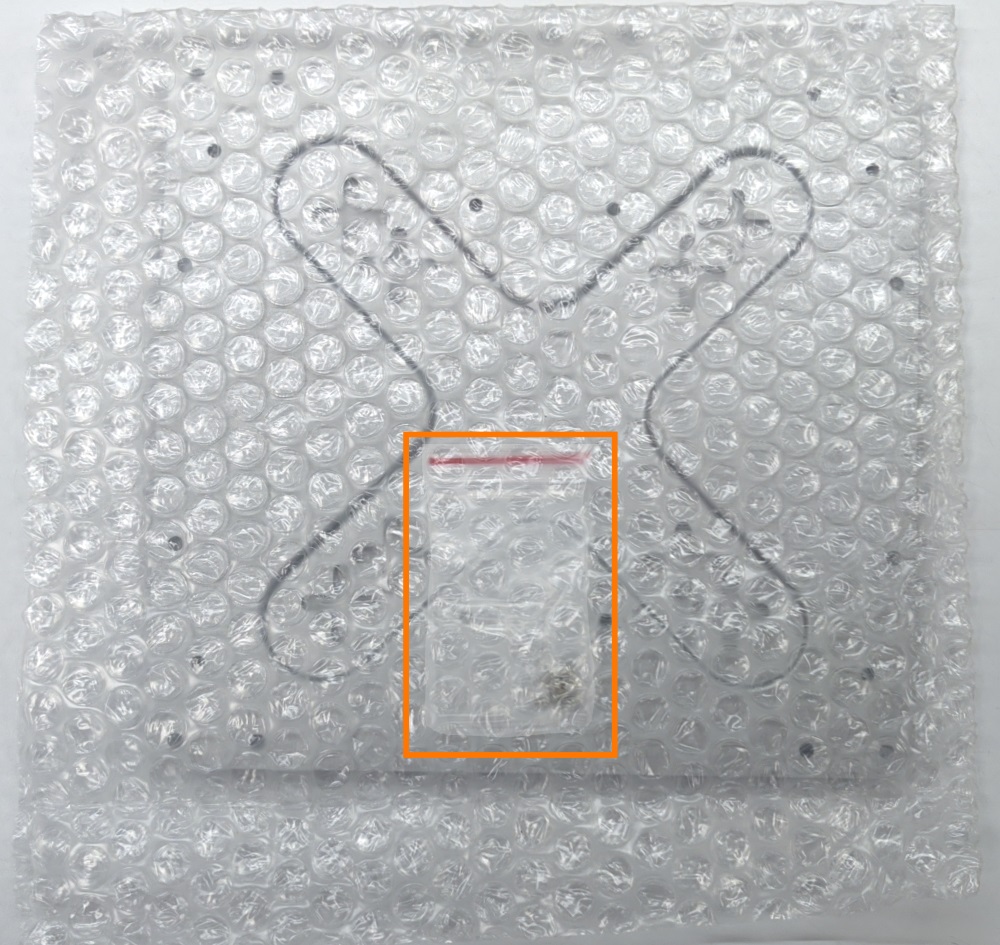
- Unpack the VESA mounting plate and remove the bubble wrap.
- Be sure not to throw away the screw bag inside.
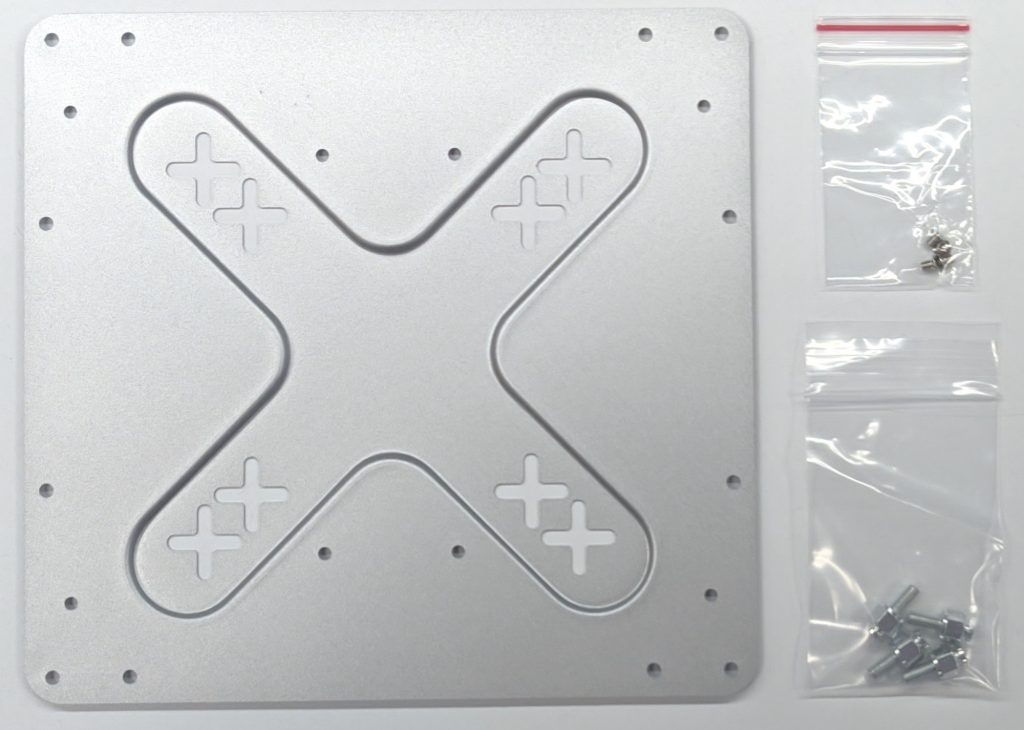
- You should have everything pictured here.
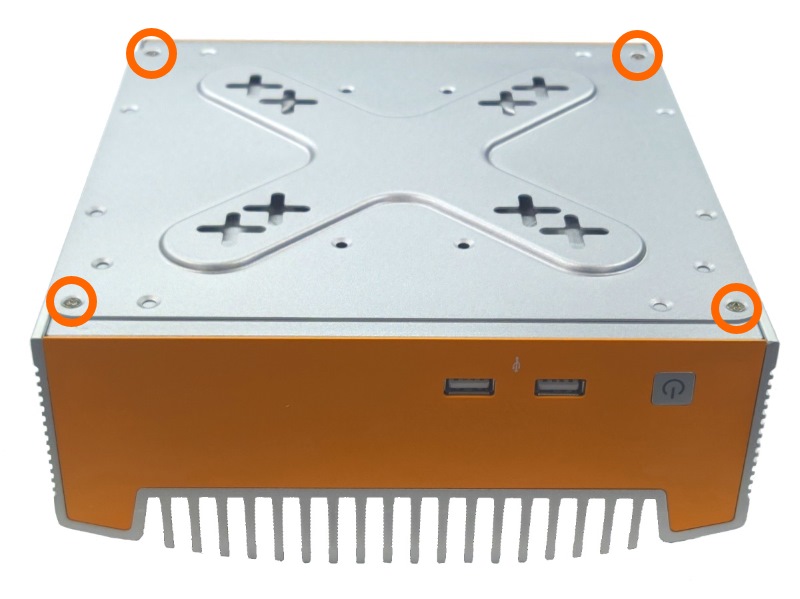
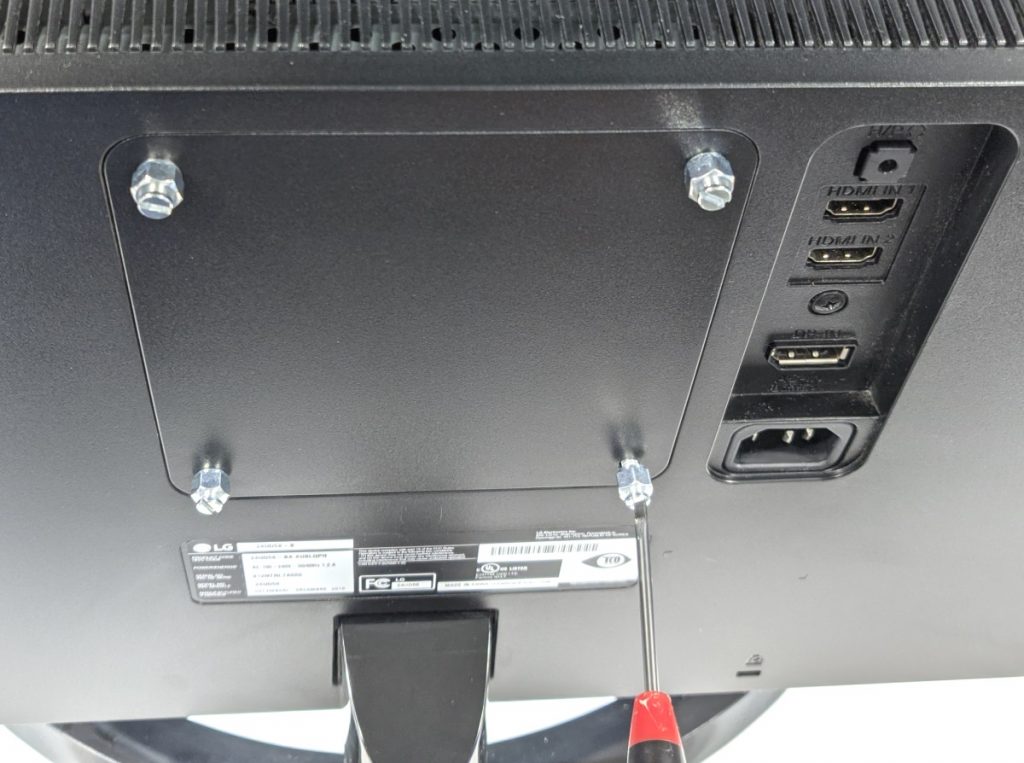
- Use the smaller of the included screws to attach the mounting plate to the bottom of your system.
- 4 screw holes should line up. Location will vary depending on model.
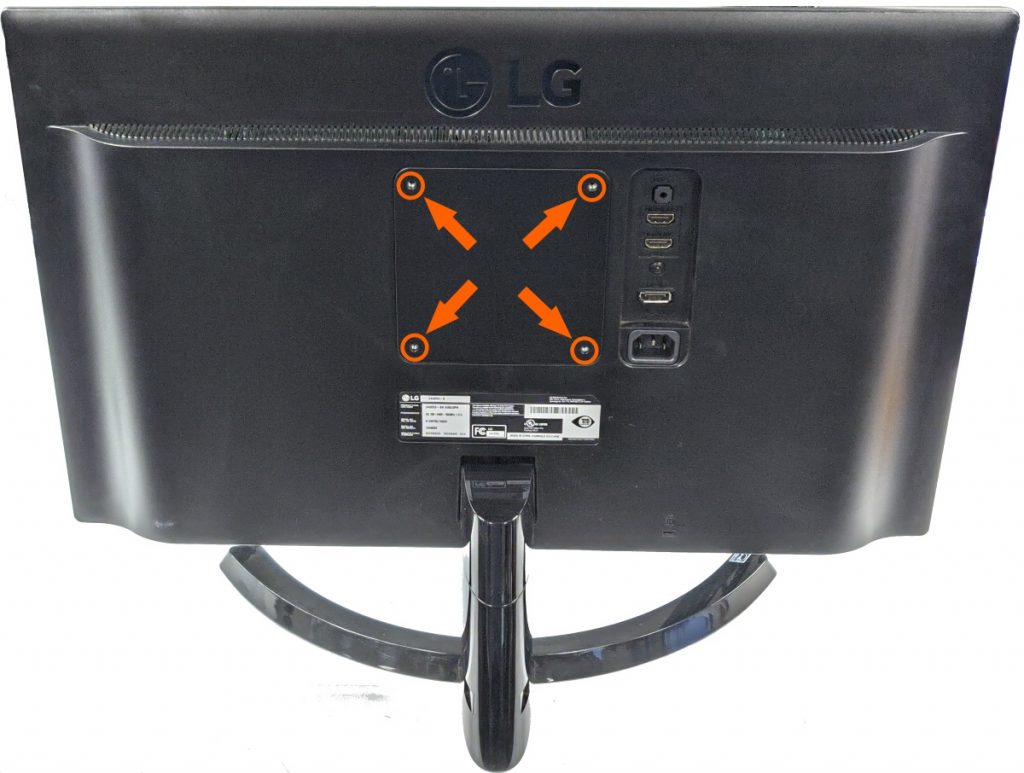
- Locate the VESA screw holes on the back of your monitor or mounting arm.
- Install the 4 bolts hand tight.
- Hang the system on the back of the display by lining up the bolts with the holes.
- Push the bolt head through the center of the + cutouts and slide the system down to lock in place.
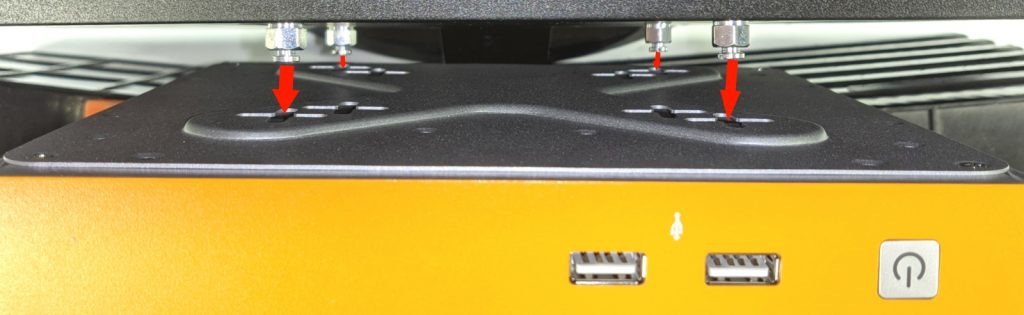

- Mounting plate shown without PC for illustration purposes
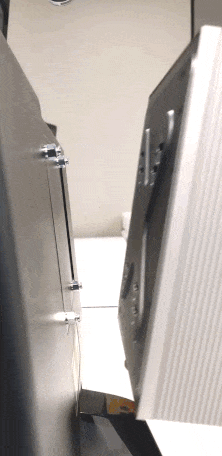
- Make sure the PC slides downward and all 4 bolts are engaged.