
Note that only SATA drives (M.2 or 2.5″) can be used in RAID on these platforms. This is due to Intel chipset limitations.
RAID Overview
RAID (Redundant Array of Independent Disks) is a technology used to stitch multiple storage drives together into a single volume for a variety of purposes. The Intel chipsets on OnLogic’s Helix and Karbon 700 platforms feature Intel Rapid Storage Technology (RST), an integrated firmware-level RAID utility for SATA disks.
Note: Intel RST on the Helix platform is only supported in Windows; Linux users will need to use a dedicated hardware RAID solution or a software-level RAID utility such as mdadm.
Because the RAID volumes are maintained at the firmware level, the disks in an array do not need to match perfectly. However, the timing parameters of all disks in a certain array, such as write speed, will be slowed down by the chipset to the lowest value among those disks. For example, an M.2 SATA III SSD may have slightly faster read and write speeds than a similar 2.5” SATA III SSD. If these two disks are stitched together in an array, the M.2 SSD’s timing parameters will be slowed to match the 2.5” SSD.
On the Karbon 700 platform, the two cabled SATA connections can be configured in RAID arrays. Karbon 700 supports RAID 0, 1, and Recovery arrays.
On the Helix platform, the M.2 B-Key, M.2 M-Key, and both cabled SATA connections can be configured in RAID arrays. Helix supports RAID 0, 1, 5, 10, and Recovery arrays.
RAID Levels
Different types of RAID arrays are referred to as “levels”. Each level has unique characteristics that provide benefits in one form or another. Different RAID levels have different applications, so be sure to pick the correct one for your use case.
RAID 0 (Striped): In a RAID 0 array, data written to the volume is split between two or more disks. Each disk’s storage space is divided into blocks, the size of which can be set by the user. When writing data to the volume, the SATA controller will rotate block-by-block between the disks. This methodology can provide noticeable improvements to read and write speeds; however, if one disk in a RAID 0 array fails, the data on the entire volume will be lost.
RAID 1 (Mirrored): In a RAID 1 array, the SATA controller mirrors all data between two or more disks. The primary benefit of this methodology is that if a drive in the array is disconnected or fails altogether, the volume will continue to function as normal. If an OS is installed on the volume, it will not be interrupted by a failing drive. A drive can then be reconnected or replaced, at which time the SATA controller will rebuild the volume (note that the rebuild process can take several hours or even days for larger volumes). This RAID configuration has no noticeable effect on write speeds but typically improves read speeds, as the system can read from multiple disks simultaneously.
RAID 5 (Striped with Parity): A RAID 5 array functions similarly to a RAID 0 array in that it stripes data across multiple disks; however, for each set of blocks, it also writes a block of parity data that can be used to recover a block on another disk if it loses that data. Thus, you can achieve some of the performance gains of a RAID 0 array while being able to withstand a single disk failure. This methodology requires at least three disks.
RAID 10 (Striped and Mirrored): A RAID 10 array combines two RAID 1 arrays in a RAID 0 array. This allows you to achieve the performance gains of a RAID 0 array while still maintaining the fault tolerance of a RAID 1 array. Data is striped between the two RAID 1 volumes, which are able to withstand and rebuild after a failed disk. This methodology requires at least four disks. This RAID level is also sometimes referred to as RAID 1+0.
Recovery: Intel Rapid Recovery Technology creates a special RAID 1 array where instead of two equivalent disks, one disk is designated the “primary” and the other the “secondary”. Data is written to the primary drive, then copied to the secondary drive as a backup. This allows you to decide if you would like the mirroring to occur continuously or only on request; in addition, the time it takes to rebuild the array after a disk failure is decreased. However, the read speed improvements of a typical RAID 1 array are not seen here, as the SATA controller will typically only read from the primary drive. Note: Creating a new RAID array will erase all filesystems and data on all the disks used.
Creating and Managing RAID Volumes with Intel RST
Enabling Rapid Storage Technology
- Begin by powering on the system and immediately press the Del key a few times to access the menu
- Using the arrow keys, navigate down to “Setup Utility” and press enter

- From the “Advanced” tab, open the PCH-IO” Configuration” menu

- Open the “SATA And RST Configuration” submenu

- Change the SATA Mode Selection to “Intel RST”
- Press F10 to save changes & exit.
Intel(R) Rapid Storage Technology Menu
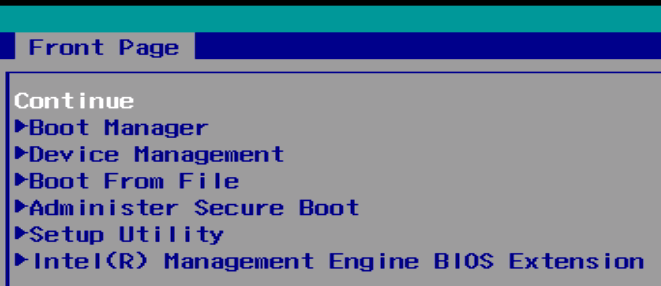
- Press Del at boot again to access the main menu.
- From the main menu, select “Device Management”. You will be greeted with the Device Manager options pictured below. Select “Intel(R) Rapid Storage Technology” to continue.

Creating a New RAID Array
The following menu will give you the option to specify the name of your RAID volume, the RAID level of the configuration, and which disks will become part of the array. Begin by specifying the name of the volume if desired and selecting a RAID Level.


Then, select which SATA disks will be used to create the array. Note that any disks being used in a different RAID array will not be selectable. If you are creating an array with the RAID level “Recovery”, you will need to select which drive is the master (M) and which is the slave (R).

For RAID 0, 5, and 10 configurations, you can specify the strip size if desired. The strip size options vary depending on the RAID level of the configuration. In addition, you can set the capacity of the volume if you would like it smaller than the maximum available. If you are creating a “Recovery” array, you can also select if the slave drive is synchronized with the master continuously or only on request.
Select “Create Volume” to return to the Device Manager menu. You should now see your new volume listed in the menu; hit F10 to save your new settings and Escape to return to the main BIOS menu.
Your RAID array is now created and ready for use.
Controlling Intel RST from Windows
In addition to using the Device Management menu in the BIOS, you can also configure and monitor RAID arrays from Windows using the Intel Rapid Storage Technology desktop application. The installer for the application can be found on the Helix Drivers page (Helix HX310 and HX330 Technical Resources or Helix HX500, HX600, & HX610 Technical Resources). The application allows you to create, monitor, and delete RAID arrays from the OS level.
Legacy method
These instructions will guide you through enabling the legacy RAID menu for operating systems that may not work with the UEFI version. The RST instructions above should be used whenever possible.

- Begin by powering on the Karbon 700 and immediately press the Del key a few times to access the menu
- Using the arrow keys, navigate down to “Setup Utility” and press enter

- From the “Advanced” tab, open the PCH-IO” Configuration” menu
- Open the “SATA And RST Configuration” submenu
- Change the SATA Mode Selection to “Intel RST”
- Press ESC 3 times to go back to the main menu

- Next, navigate over to the Boot tab and change the Boot Type to Legacy

- Exit Saving Changes
- The K700 will now reboot. As soon as it does, hold the Control key and tap “I” until you see the Intel Rapid Storage Technology menu

- Select option 1 from the menu

- Use the tab key to navigate and the up/down arrows to change options.
- A RAID1 configuration is shown
- Tab down to “Create Volume” and press enter

- You will be taken back to the main screen and your new RAID volume will be visible.
- Select option 6 to Exit, and then press Control-Alt-Del to restart

- You will now toggle the boot mode back to UEFI
- Press Del at reboot to access the menu
- Open the Setup Utility

- Change the boot mode back to UEFI
- Finally, Exit Saving Changes

Your RAID volume is now ready to use.